A close-up view of asphalt shingles showing the texture and granules.

Understanding Granules on Shingles: What They Mean for Your Roof

Granules on shingles are crucial for your roof’s protection. They guard against UV rays, weather damage, and even fires. If you see granule loss, it could signal a problem with your roof. This article covers why these granules are important and what to do if they start coming off.

Key Takeaways

  • Granules on shingles provide essential protection, enhancing fire resistance and UV protection, which helps maintain the durability and longevity of the roof.
  • Regular inspections can identify early signs of granule loss, allowing homeowners to address potential issues and prolong the life of their roofing system.
  • Widespread granule loss, particularly on roofs older than 20 years, may indicate the need for a roof replacement to prevent costly damages and ensure effective functioning.

Understanding Granules on Shingles: What They Mean for Your Roof

A close-up view of asphalt shingles showing the texture and granules.

Granules used in shingles are typically composed of crushed stone and can include materials like slate, stone, or ceramics. These shingle granules are not just for show; they serve a critical purpose in protecting your roof and maintaining its durability. The granules provide a color that enhances the curb appeal of your home while also imparting fire-resistant qualities to the shingles.

Moreover, these tiny granules protect the underlying layers of your roofing system from the elements. Granules protect your roof from harmful UV rays, weather conditions, and potential fire hazards, significantly enhancing its longevity and aesthetic appeal. Understanding their importance is the first step in ensuring your roof remains robust and reliable.

Introduction

Knowing the role of granules on shingles helps maintain roof integrity and prevent costly repairs. Being aware of granule loss helps homeowners avoid premature roof deterioration and potential leaks, prolonging the life of their roofing investment.

Granules enhance the aesthetic appeal of roofing shingles, contributing to the overall look of the home. Regular inspections can help prevent granule loss from worsening. Regular professional inspections can uncover early signs of granule loss, allowing for timely interventions and safeguarding your roof.

What Are Shingle Granules?

An image illustrating the composition of shingle granules.

Crushed stone in shingle granules provides essential structural integrity and waterproofing to asphalt shingles. These granules serve several essential functions, including protecting the roof and maintaining its durability against environmental factors. Without these granules, the underlying layers of roofing materials would be exposed to the elements, leading to faster deterioration and potential damage.

In addition to their functional properties, mineral granules enhance the aesthetic appeal of shingles through their textural qualities and color. They are available in various colors, allowing homeowners to select a style that complements their home. This combination of structural and aesthetic benefits makes granules an indispensable component of roofing shingles.

The Function of Granules on Asphalt Shingles

A visual representation of the function of granules on asphalt shingles.

Granules offer fire resistance, color, and protection against UV rays. Blocking harmful UV rays, they prevent asphalt deterioration and extend the lifespan of roofing shingles. Additionally, granules protect the underlying layers from weather exposure, which enhances the durability of the roofing system.

They help prevent rain, snow, and ice from collecting on the roof and gutters, reducing potential damage. Aesthetically, granules can be manufactured in various colors, allowing homeowners to select a style that complements their home. High-quality shingles often include UV inhibitors to enhance durability and minimize granule loss.

UV Protection

Granules protect the asphalt layer from sunlight, preventing aging and deterioration. Acting as a barrier against harmful rays, granules prevent asphalt degradation, which is crucial in avoiding premature aging of shingles. This protection helps maintain the roof’s integrity, ensuring it remains durable and effective over time.

Weather Resistance

Granules weatherproof roofing systems, enhancing their ability to withstand environmental elements. They enhance the shingles’ ability to resist harsh weather conditions, including heavy rain and strong winds. Granules also boost shingles’ resilience against impacts from debris, acting as a first line of defense against weathering threats.

Fire Resistance

Granules enhance the fire-resistant properties of asphalt shingles, increasing their safety in case of fire. Made from materials that are resistant to fire, asphalt shingle granules enhance the overall safety of the roofing system. They add a layer of protection, helping to prevent fire spread and improving roof fire safety.

Causes of Granule Loss on Roofing Shingles

An image depicting granule loss on a shingle roof.

Common causes of granule loss include aging roofs, improper installation, and severe weather events. As roofs age, the bond between asphalt and granules weakens, leading to increased granule loss. Normal wear and tear, along with exposure to wind, water, mold, and impacts, contribute to granule loss as the roof ages.

Improper installation accelerates granule loss and leads to further roofing issues. Installation defects like poor-quality materials or inadequate sealing can cause significant granule loss.

Severe weather conditions, like hail and heavy wind, can lead to significant granule loss and compromise roofing system integrity.

Aging Roof

The age of the roof is the primary cause of granule loss on roofing shingles. As roofs age, they erode due to exposure to wind, water, mold, or impacts. The bond between asphalt and granules tends to weaken, increasing granule loss over time. A lack of granules accelerates roof deterioration due to exposure to the elements.

Improper Roof Installation

Improper installation practices can result in a faster loss of granules and other roofing problems. Failing to meet roofing installation standards can significantly increase granule loss. Improper handling and cutting of shingles during installation contribute to granule detachment. While some granule loss during installation is normal, excessive loss may indicate installation issues.

Severe Weather

Severe weather conditions can compromise the integrity of granules, leading to their detachment. Wind-driven rain exacerbates granule loss during storms. Inspecting your roof after severe weather can identify early signs of granule loss and prevent further damage.

Signs of Excessive Granule Loss

Homeowners can spot granule loss by checking for bald spots on shingles and examining areas around downspouts and gutters. Loose granules in gutters, patchy, discolored, or bald areas on the roof indicate significant granule loss. Finding large amounts of granules in the gutters indicates excessive granule loss, especially for older roofs.

Discoloration, bald spots, and excessive granules in gutters are key indicators that repairs or roof replacement may be necessary. Noticing these signs allows you to take prompt action to address potential roofing problems before they escalate.

Discolored or Bald Spots

Homeowners should look for uneven coloration or bald spots on their roof as indicators of potential granule loss. Look for irregular patches or areas lacking granules on the shingles, which may suggest a deeper issue with the roof’s integrity.

Granules in Gutters

Finding granules in gutters is often a normal occurrence, especially after a storm, as shingles naturally shed granules due to aging. However, excessive granule loss can lead to clogged gutters, which might cause water pooling in undesirable areas, damaging the roof and home’s foundation.

Homeowners should not be overly concerned about a few granules found in the gutters, as this is often not indicative of a problem. If excessive granule loss is noticed, it is crucial to contact a professional roofer for a thorough inspection to assess the roof’s condition.

Impact of Granule Loss on Your Roof’s Lifespan

Granules serve as a protective layer that safeguards the asphalt and fiberglass mat layers from weather damage. They help to prevent the accumulation of water, snow, and ice on roofs and gutters, preserving the roof’s structural integrity. Significant granule loss can expose the shingle’s bitumen layer to elements, hastening deterioration.

Missing shingle granules can indicate increased vulnerability to damage from storms, water, or impacts. Roof damage and costly repairs can result from asphalt shingle granule loss. Extensive granule loss, combined with the age of the roof, indicates the need for roof replacement. Addressing granule loss promptly can prevent these issues and extend the lifespan of your roof.

Decreased Durability

Granule loss leads to significant deterioration of the shingles, making them more susceptible to damage from the elements. As granules are lost, the underlying asphalt becomes exposed, weakening the shingles and reducing their overall lifespan. Decreased shingle durability can lead to increased risk of leaks, water damage, and the need for costly repairs.

When granules are lost, the shingles cannot effectively resist harsh weather, which can accelerate further deterioration.

Increased Risk of Leaks

Granules direct water off shingles and prevent pooling, essential for maintaining roof integrity. When few shingle granules are lost, the exposed asphalt layer loses effectiveness, compromising the roof’s water protection.

Compromised roof shingles can develop gaps and cracks, increasing the likelihood of leaks. The combined effect of granule loss and the resulting exposure to the elements creates an increased risk of leaks and severe water damage within the roofing structure.

Preventing and Managing Granule Loss

A checklist for preventing granule loss on roofing shingles.

Regular inspections can help reduce the risk of granule loss on your roof. Hiring a professional roofing service ensures safety during hazardous work and effective repairs.

Power washing removes granules from shingles, accelerating wear and leading to further granule loss. Manufacturing defects in roofing materials can cause premature granule loss, highlighting the importance of quality materials.

Regular Roof Inspections

Regular inspections help catch early signs of granule loss, which is crucial for maintaining your roof. Annual roof maintenance helps manage granule loss. If you notice granule loss on your roof, find a trusted professional roofing contractor.

When choosing a roofing contractor, select a reputable one with quality reviews.

Proper Maintenance

Avoid excessive walking on shingles to minimize granule loss during maintenance. Regularly cleaning gutters helps prevent water damage and reduces shingle wear. Trimming overhanging branches minimizes debris buildup and prevents shading that can accelerate wear.

Proper maintenance practices ensure the longevity and effectiveness of your roof.

Choosing Quality Roofing Materials

Choosing high-quality roofing materials can significantly enhance the longevity and performance of your asphalt shingle roof. Specific high-quality asphalt shingles are known for their long-term performance and help prevent significant granule loss. While cheaper shingles may seem attractive, they often come with lower quality and less durability.

Investing in quality materials provides better protection and fewer maintenance issues in the long run.

When to Consider Roof Replacement

Widespread granule loss, especially on roofs older than 20 years, may indicate it’s time for a replacement. Significant granule loss around downspouts or in gutters may indicate that your roof is nearing the end of its useful life. It’s essential to address these issues quickly to maintain your roof’s functionality and prevent further damage.

If your roof is nearing the end of its lifespan, call a roofer for an assessment. They can provide a professional evaluation to determine the roof’s condition and whether a replacement is necessary. Addressing these issues proactively can save you from more extensive damage and higher costs in the future.

Age of the Roof

Roof replacement should be considered as it approaches 80-85% of its expected lifespan. A roof nearing the end of its life expectancy often requires a professional evaluation to determine its condition. Addressing issues early ensures the longevity and effectiveness of your roofing system.

Extent of Damage

Assessing the severity of granule loss helps determine if a new roof installation is needed. Factors such as the extent of damage from storms, heavy rainfall, and other factors can influence the decision. A professional roofer can offer a free estimate and help determine the best course of action for your roof replacement.

Working with a Professional Roofing Company

Hiring a professional roofing company ensures effective inspections, repairs, and replacements. Contractors often provide warranties for their work, safeguarding against potential future issues. Working with professionals ensures your roof is in good hands and any issues are addressed promptly and efficiently.

Professional roofing services enhance the quality and durability of your roof through expert repair and replacement. Companies like A&M Home Services employ licensed and knowledgeable roofers, ensuring high workmanship standards. Professional roofing services often come with warranties that safeguard your investment.

Summary

Understanding the role of granules in your roofing system is crucial for maintaining its integrity and longevity. From protecting against UV rays and weather elements to providing fire resistance, granules play a vital role in preserving your roof.

Regular inspections, proper maintenance, and choosing quality materials can prevent excessive granule loss and extend the life of your roof. When signs of significant granule loss appear, consulting with a professional roofer ensures timely interventions and effective solutions. Taking these proactive steps will keep your roof in optimal condition, safeguarding your home for years to come.

Frequently Asked Questions

What are shingle granules made of?

Shingle granules are primarily made of crushed stone materials such as slate, stone, or ceramics. This composition enhances their durability and functionality on roofing structures.

How do granules protect my roof?

Granules serve as a critical shield for your roof by safeguarding its layers from UV rays, harsh weather, and fire risks. This protection enhances the longevity and integrity of your roofing system.

Why is my roof losing granules?

Your roof may be losing granules due to aging, improper installation, or damage from severe weather. It is essential to address these issues promptly to maintain the integrity of your roof.

How can I prevent granule loss?

To prevent granule loss, conduct regular roof inspections, ensure proper maintenance, and select high-quality roofing materials. These actions will significantly enhance the longevity and effectiveness of your roof.

When should I consider a roof replacement?

You should consider a roof replacement when there is widespread granule loss, particularly if the roof is over 20 years old or exhibits significant damage. Timely replacement can prevent further issues and ensure the integrity of your home.

A comfortable home environment enhanced by attic insulation.

Why Is Attic Insulation Important?

Attic insulation is essential for reducing energy bills, maintaining home comfort, extending the lifespan of HVAC systems, and preventing moisture damage. Understanding why attic insulation is important can help you make informed decisions for a more efficient and comfortable home.

Key Takeaways

  • Attic insulation can reduce energy bills by 15% to 50%, improving overall energy efficiency and comfort within the home.
  • Proper insulation protects HVAC systems by minimizing their workload, extending their lifespan and ensuring they operate efficiently.
  • Insulation improves indoor air quality by blocking outdoor pollutants and moisture, preventing mold growth and enhancing overall home health.

Why Is Attic Insulation Important?

An overview of attic insulation importance.

Attic insulation is not just a layer of material; it’s a shield that protects your home from various external and internal elements. A key benefit of attic insulation is its ability to significantly reduce energy bills. Homeowners can save between 15% to 50% annually on energy costs, depending on the quality and type of insulation. This is because a well-insulated attic keeps the heat inside during winter and prevents cool air from escaping in summer, leading to a more consistent indoor temperature throughout the year.

Beyond energy savings, proper attic insulation also extends the lifespan of your HVAC system. Insulation helps heating and cooling units operate more efficiently and last longer by reducing their workload.

Additionally, insulation prevents moisture accumulation, which can lead to mold growth and structural damage. Lastly, it enhances indoor air quality by blocking outdoor pollutants and allergens from infiltrating your home.

Introduction

Attic insulation is a cornerstone of home comfort and energy efficiency. It plays a pivotal role in maintaining a consistent temperature throughout your house, ensuring that you stay warm during the winter and cool in the summer. This consistency not only eliminates hot and cold spots but also reduces the strain on your HVAC system, extending its lifespan and improving its efficiency.

Moreover, proper insulation acts as a barrier against outdoor pollutants and allergens, significantly enhancing indoor air quality. By reducing energy consumption, attic insulation also lowers your carbon footprint, contributing to environmental protection. In essence, investing in adequate insulation is one of the most important things you can do to improve your home’s overall efficiency and comfort.

Reduces Energy Bills

A visual representation of reduced energy bills due to proper insulation.

One of the most tangible benefits of attic insulation is the reduction in energy bills. Proper insulation can save homeowners an average of 30% on utility costs. This is because insulation helps maintain a consistent indoor temperature, reducing the need for constant heating and cooling. By preventing heat loss in the winter and keeping your home cool in the summer, insulation ensures that your HVAC system doesn’t have to work as hard, leading to significant savings on energy bills.

Moreover, proper attic insulation contributes to energy efficiency by reducing air leakage. This minimizes the escape of conditioned air, further lowering energy consumption and costs. Inadequate insulation, on the other hand, can lead to moisture accumulation, increasing the risk of mold growth and structural damage.

Therefore, installing insulation is a wise investment that pays off through reduced energy bills and a more comfortable living environment.

Enhances Indoor Comfort

A comfortable home environment enhanced by attic insulation.

A properly insulated attic goes a long way in enhancing indoor comfort. By stabilizing temperatures, insulation minimizes drafts and prevents conditioned air from escaping your home. This means that whether it’s the peak of summer or the dead of winter, your home remains at a comfortable temperature without the need for constant thermostat adjustments.

Furthermore, effective attic insulation eliminates hot and cold spots, ensuring a consistent temperature throughout the house. This not only enhances comfort but also improves overall satisfaction with your living space. Without adequate insulation, you might find some rooms too hot and others too cold, leading to discomfort and higher energy bills.

Protects HVAC System

Proper insulation is a boon for your HVAC system. A well-insulated attic reduces the workload on heating and cooling units, minimizing wear and tear and extending their lifespan. By reducing the frequency of HVAC operation, insulation helps in maintaining the efficiency of the system, which in turn lowers energy costs.

Insufficient attic insulation, however, puts additional strain on your HVAC system, leading to premature failures and costly repairs. Therefore, ensuring a properly insulated attic is not just about comfort and energy savings; it’s also about protecting your significant investment in your home’s heating and cooling systems.

Improves Indoor Air Quality

Attic insulation plays a crucial role in improving indoor air quality. Insulation minimizes the infiltration of allergens and contaminants into your home by creating a barrier against outdoor pollutants. This is especially important for individuals with asthma or allergies, as insulation helps reduce triggers and symptoms.

Additionally, a well-insulated attic can contribute to a quieter home environment by providing noise reduction. Insulation also helps in preventing pest infestations, which can compromise both the insulation material and indoor air quality.

Therefore, proper insulation not only ensures energy efficiency and comfort but also promotes a healthier living space.

Prevents Moisture Damage

Moisture is a silent enemy that can cause significant damage to your home’s structure. Proper attic insulation prevents moisture buildup, which is critical for maintaining the integrity of wooden structures. By keeping moisture at bay, insulation helps in preventing the growth of mold and mildew, which can lead to health issues and costly repairs.

Inadequate insulation, on the other hand, can lead to higher levels of moisture, increasing the risk of structural damage and ice dams during winter. Therefore, ensuring adequate insulation in your uninsulated attic is essential for protecting your home from moisture-related problems.

Environmental Impact

Attic insulation has a significant positive impact on the environment. By reducing energy consumption, insulation lowers the demand for energy production, which in turn reduces pollution and carbon emissions. This makes your home not only more energy-efficient but also more eco-friendly.

Blown-in cellulose insulation, for instance, is an eco-friendly option made from recycled materials that helps reduce air leakage and energy consumption. Proper insulation also eases the reliance on HVAC systems, minimizing operational demand and temperature fluctuations, especially in cold air conditions and warm air.

Investing in attic insulation is a step towards a greener and more sustainable future.

Signs You Need New Insulation

Signs indicating the need for new insulation in an attic.

Recognizing the signs that you need new insulation can save you from many discomforts and high energy bills. Key indicators include fluctuating temperatures in your home, unusually high energy bills, and visible wear and tear on your current insulation.

Understanding these signs can help you take timely action and ensure your home remains comfortable and energy-efficient.

Fluctuating Temperatures

Inadequate insulation often results in fluctuating temperatures in different areas of your home. If one room feels like a sauna while another is an icebox, it’s a clear indication that your home is not maintaining a consistent temperature. This inconsistency can lead to discomfort and increased energy bills, as your HVAC system works overtime to compensate for the inadequate insulation and hot air.

Inconsistent temperatures can also result in higher energy costs, as the heating or cooling system must run longer to achieve the desired indoor climate. By ensuring adequate insulation, you can maintain a consistent temperature throughout your home, enhancing comfort and reducing energy expenses.

High Energy Bills

Seeing a sudden spike in your energy bills? This could be a sign that your attic insulation is no longer effective. Inadequate insulation causes your HVAC system to work harder to maintain a comfortable temperature, leading to higher energy consumption and increased costs.

A noticeable increase in energy costs often indicates that your current insulation is failing. By investing in new insulation, you can improve energy efficiency, reduce energy consumption, and save money on utility bills.

Visible Insulation Wear

Visible signs of wear and tear on your insulation, such as cracks, water damage, or pest infestations, indicate the need for replacement. Insulation that shows evidence of shifting or sagging is also a sign that it is no longer providing adequate protection.

Addressing these issues by installing new insulation ensures your home remains energy-efficient and comfortable. Regular inspection of your attic insulation can help you catch these signs early and take proactive measures to maintain your home’s insulation.

Types of Attic Insulation

Different types of attic insulation materials displayed.

There are several types of attic insulation, each with its unique benefits and characteristics. Common options include loose fill insulation, batt and roll insulation, and spray foam insulation.

Knowing the differences helps you choose the right insulation type for your attic space and specific needs.

Loose Fill Insulation

Loose fill insulation is a popular choice for attics because it can cover hard-to-reach areas effectively. Unlike batt or roll insulation, loose fill provides better coverage and can be installed on the attic floor to keep the attic cold.

This type of insulation is ideal for attics with irregular shapes or multiple obstructions, as it can fill gaps and voids more easily than other types. Choosing loose fill insulation ensures thorough coverage and enhanced energy efficiency in your attic.

Batt and Roll Insulation

Batt and roll insulation, often made from fiberglass, is another common choice for attic spaces. This insulation type comes in pre-cut panels or rolls, making it easy for homeowners to install themselves. It is suitable for a variety of attic types and offers good thermal protection and energy efficiency.

The pre-cut nature of batt and roll insulation allows for straightforward installation, making it a popular DIY option. Proper fitting and sealing are essential to maximize the effectiveness of batt and roll insulation.

Spray Foam Insulation

Spray foam insulation provides an effective air barrier, significantly reducing air infiltration and improving energy efficiency. This type of insulation expands upon application, filling gaps and creating a tight seal that other insulation types may not achieve.

Spray foam insulation is particularly beneficial for homes with complex attic spaces or areas prone to air leaks. Choosing spray foam enhances your home’s energy efficiency and indoor air quality, making it a worthwhile investment.

Preparing for Attic Insulation Installation

Before installing new attic insulation, it’s crucial to prepare the space properly. Clear out any dust and debris to ensure the insulation can be laid evenly and effectively. Inspect the attic for structural issues, such as roof leaks, and address any problems before proceeding with the insulation installation.

Additionally, check for pest infestations, as pests can damage insulation materials. Sealing air leaks around fixtures and ducts enhances the performance of the new insulation.

Measure the current insulation depth to determine how much additional insulation is necessary.

Professional Installation vs. DIY

When it comes to installing insulation, homeowners often face the choice between professional installation and a DIY approach. Hiring professionals ensures compliance with local building codes and reduces the risk of improper installation. Professionals can also offer warranties on their work, providing assurance against future issues.

While DIY might save on labor costs, mistakes could lead to higher energy bills and poor insulation performance. Professionals are trained to handle hazardous materials safely and can provide even coverage and proper sealing of gaps.

Therefore, investing in professional installation can be a wise decision, enhancing the effectiveness and longevity of your attic insulation.

Summary

In conclusion, attic insulation is a critical component of a comfortable, energy-efficient home. It reduces energy bills by preventing heat loss and maintaining a consistent indoor temperature, enhances indoor comfort by eliminating drafts and temperature fluctuations, and protects your HVAC system by reducing its workload. Additionally, proper insulation improves indoor air quality by blocking outdoor pollutants and allergens, prevents moisture damage, and has a significant positive environmental impact.

Recognizing the signs that you need new insulation, such as fluctuating temperatures, high energy bills, and visible insulation wear, can help you take timely action. With various insulation types available, including loose fill, batt and roll, and spray foam, you can choose the best option for your attic space. Whether you opt for professional installation or a DIY approach, proper preparation and installation are key to maximizing the benefits of attic insulation. Investing in attic insulation not only improves your home’s comfort and efficiency but also contributes to a healthier and more sustainable environment.

Frequently Asked Questions

What service does A&M Home Services provide related to attics?

A&M Home Services specializes in professional attic insulation and ventilation services, ensuring a well-maintained and energy-efficient attic space.

What problems can proper attic insulation solve for homeowners?

Proper attic insulation can effectively address issues of uncomfortable indoor temperatures and reduce high energy bills for homeowners. Ensuring your attic is well-insulated not only enhances comfort but also improves energy efficiency.

What is a common issue for homes older than five years regarding attic insulation?

Insufficient or missing attic insulation is often a significant issue for homes older than five years. Ensuring your attic is properly insulated can enhance energy efficiency and comfort in your home.

How can homeowners determine if they are losing heated or cooled air?

Homeowners can effectively determine air loss by conducting an energy evaluation with insulation experts, who will identify any leaks and inefficiencies in the home. This proactive approach ensures better energy efficiency and comfort.

A house with a newly installed roof showcasing asphalt shingles.

A Complete Guide on How to Reroof a House

Need to reroof a house? This guide covers when to reroof, what materials you’ll need, and how to get it done, either doing it yourself or with professional help. Let’s ensure your next roofing project is a success.

Key Takeaways

  • Reroofing requires careful planning, with key indicators for replacement including widespread damage or an aging roof over 20 years.
  • Selecting the right materials is crucial; options like asphalt, metal, and synthetic shingles each offer unique benefits and considerations for longevity and cost.
  • Deciding between DIY and professional installation involves weighing cost savings against the risks of improper installation, with professional work ensuring quality and safety.

The Complete Guide to Reroof a House

A house with a newly installed roof showcasing asphalt shingles.

Reroofing a house involves more than just slapping new shingles over the old ones. It’s a meticulous process that requires careful planning and execution to ensure the longevity and durability of your home’s roof. From understanding when to reroof to selecting the best materials, each step plays a vital role in the overall success of the project.

This guide covers indicators for roof replacement, available roofing materials, and detailed reroofing steps, including DIY roof replacement options. We also explore cost considerations, DIY versus professional installation, and tips for enhancing and maintaining your new roof.

This guide will equip you with the knowledge needed to make informed decisions for your reroofing project.

Introduction

Roof replacement is not just a necessary repair; it’s an investment in the future of your home. A new roof can protect against weather damage, enhance energy efficiency, and significantly improve curb appeal. The condition of your roof directly impacts the overall durability and safety of your home, making it essential to address any issues promptly.

Replacing your roof can also increase your home’s value, providing peace of mind for both current homeowners and potential buyers. With so much riding on the integrity of your roof, making informed decisions about materials, contractors, and the reroofing process is crucial. This guide will provide you with the information needed to navigate these decisions confidently.

Understanding When to Reroof

Understanding when to reroof your home is key to the roof replacement process. Indicators such as widespread damage, frequent repairs, and an aging roof (over 20 to 25 years) signal the need for action. A roof inspection helps pinpoint specific issues and decide if replacement or repairs are needed.

Reroofing involves installing new shingles over existing ones that are still in good condition. This method can be a cost-effective solution if the underlying roof deck and sheathing are intact. However, if there are signs of structural issues, such as sagging or damaged flashing, a full roof replacement might be necessary. Understanding these indicators will help you make an informed decision about when to reroof.

Roof replacement can be done primarily in two ways. These methods are overlay and tear-off. An overlay adds a new layer of shingles over the existing ones, while a tear-off involves removing the old roof down to the deck. Each method has its pros and cons, and your choice will depend on the condition of your current roof and your long-term goals.

Choosing the Right Roofing Materials

Different types of roofing materials including asphalt shingles and metal roofs.

Selecting the right roofing materials is crucial for the success of your roof replacement project. There are various options available, each with distinct advantages and disadvantages. Asphalt shingles are the most commonly chosen due to their affordability and ease of installation, with a lifespan of about 20 to 25 years. They are available in different styles, including architectural shingles, which offer enhanced durability and aesthetic appeal.

Metal roofs are another popular choice, known for their longevity and resistance to severe weather conditions. They can last over 50 years, making them a durable option for homeowners seeking long-term roofing material solutions. Clay tiles and wood shakes provide excellent insulation and a natural aesthetic, though they require more maintenance and are typically more expensive.

Synthetic slate shingles replicate the look of traditional slate but are lighter and easier to install. Consider the climate in your area, your budget, and the architectural style of your home when choosing roofing materials. Consulting with a professional roofing contractor can also provide valuable insights into the best options for your specific needs.

Preparing for a Roof Replacement

Preparation is key to a successful roof replacement. Start by reviewing local regulations and permit requirements to ensure compliance with building codes. Clear driveways and outdoor spaces, and take safety measures to protect pets and children during the roofing project. Informing neighbors about the installation schedule and expected noise disturbances is also a courteous step.

Protecting your Home during the roofing process is essential. Cover flowers and shrubbery to prevent damage, and ensure that valuables in the attic are safely stored away from potential debris. Designate a safe and accessible area for storing roofing materials, such as a garage or covered area, to keep them protected from the elements.

Taking these proactive steps will help minimize disruptions and ensure a smoother roofing project. Proper preparation also reduces the risk of accidents and Home damage, making the overall experience less stressful for homeowners.

The Roof Replacement Process Explained

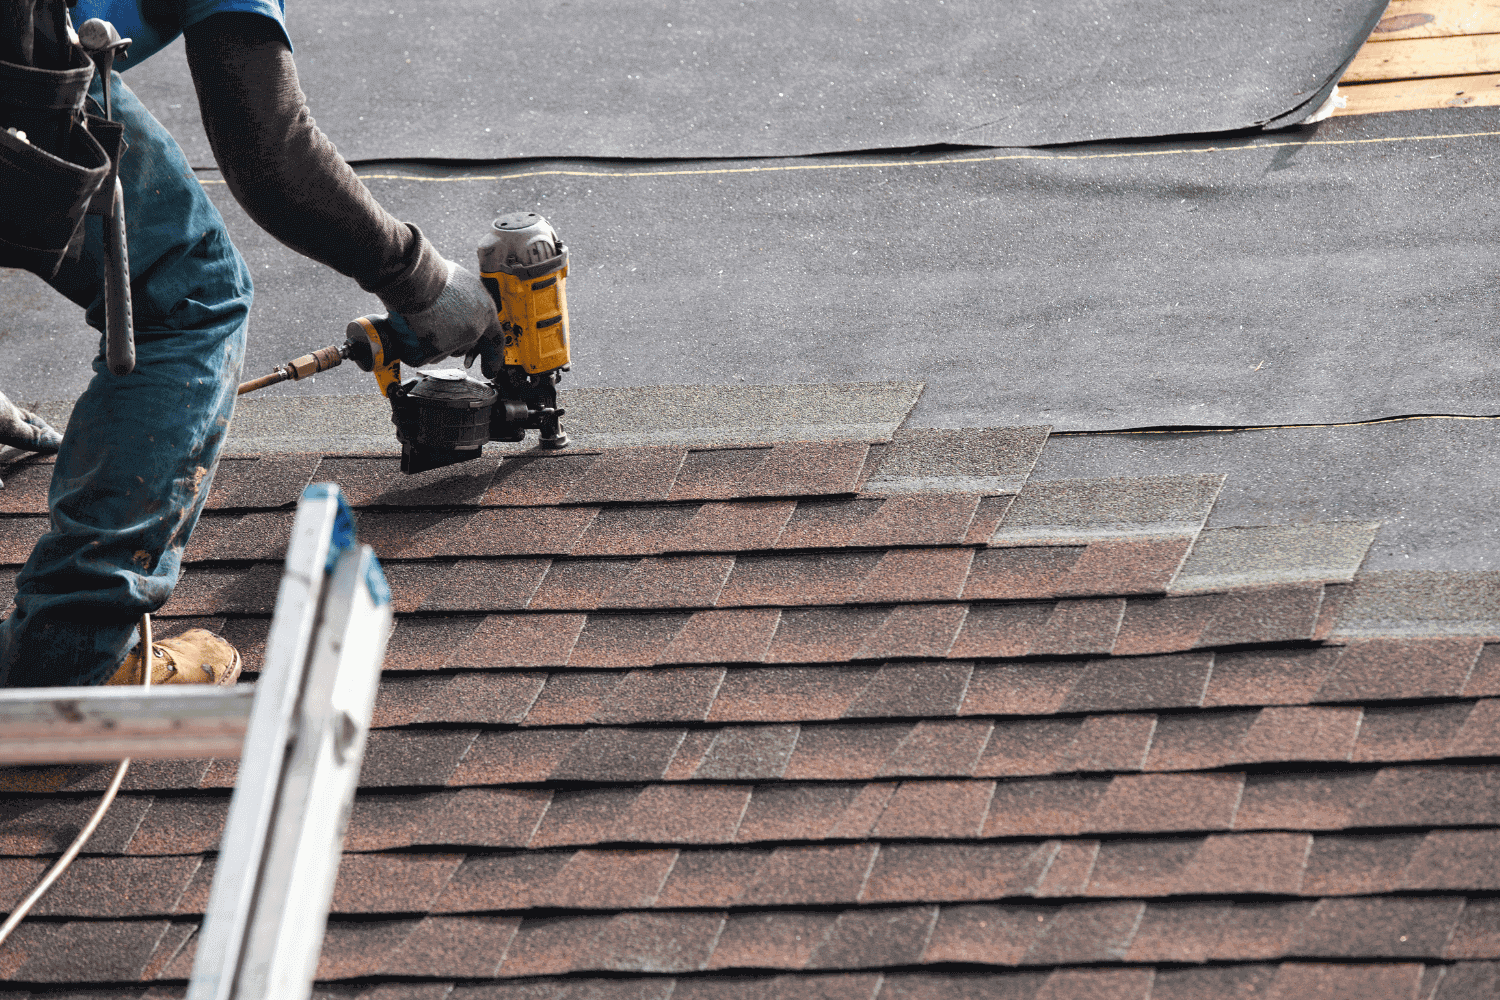
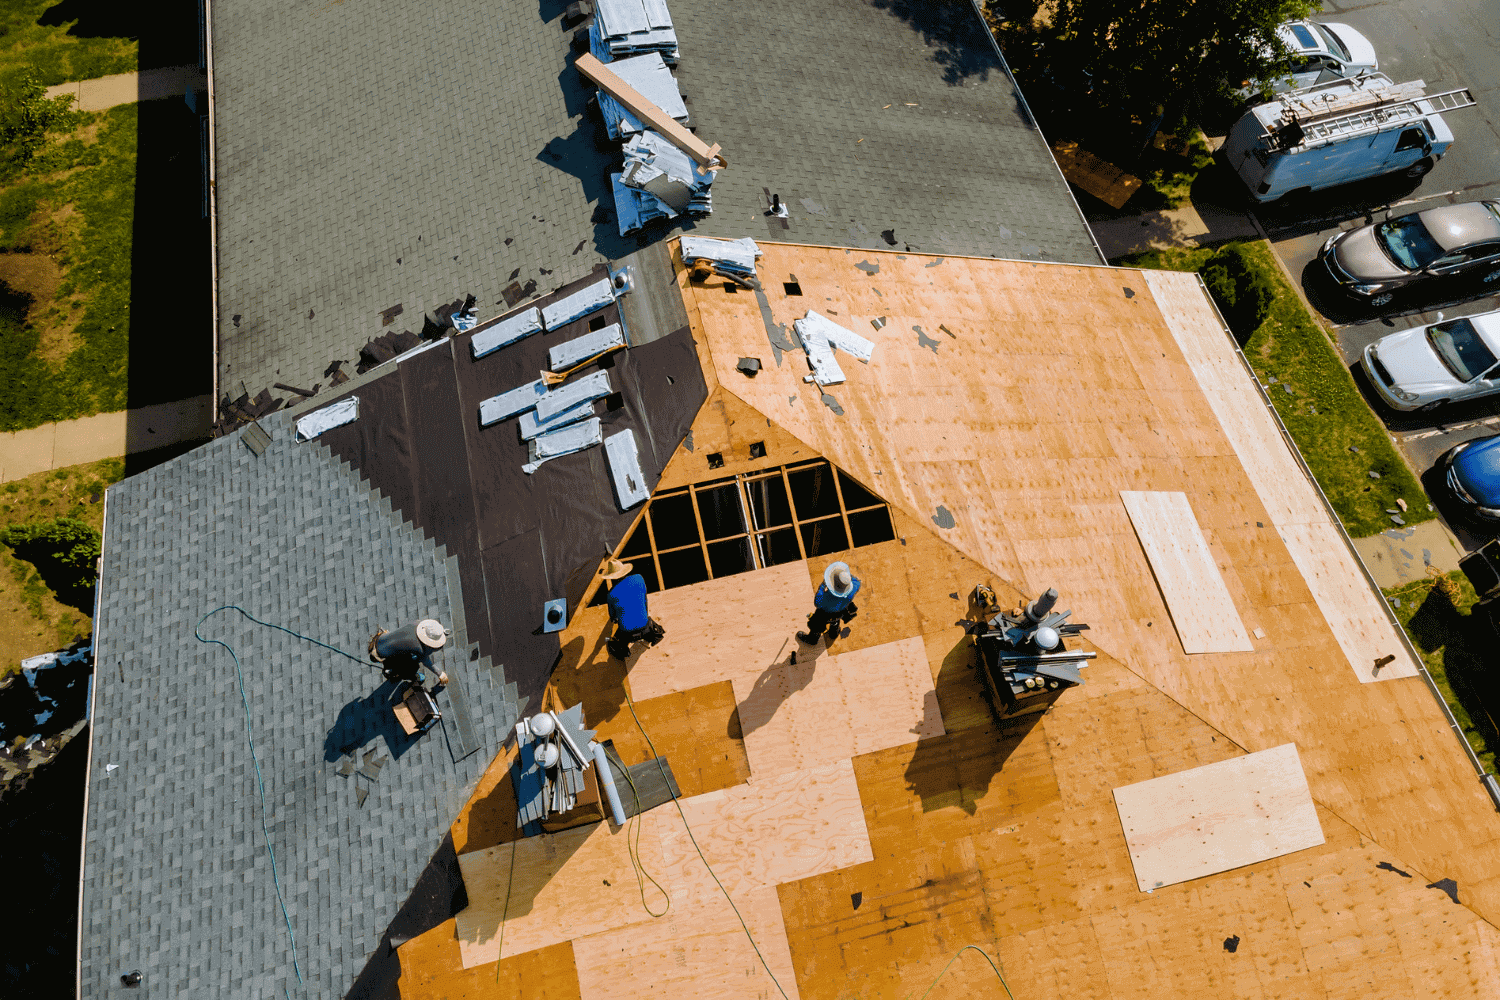
A professional roofing contractor working on a roof replacement project.

The roof replacement process involves several critical steps, each contributing to the durability and effectiveness of the new roof. From removing old shingles to installing new materials, understanding each phase can help you follow along and ensure the job is done correctly.

Let’s break down these steps in detail.

Removing Old Shingles

Removing old shingles is a crucial first step in the roof replacement process. New shingles should ideally not be placed over old ones as this can reduce the lifespan of the new materials and complicate future repairs. Using a roofing shovel, carefully remove the old shingles, nails, and any other debris to prepare the roof deck for the new installation.

Roof replacement can be done primarily in two ways. These methods are overlay and tear-off. While overlaying is more cost-effective, it’s not suitable for roofs with significant damage. The tear-off method, which involves removing the existing roof down to the deck, is often preferred as it allows for a thorough inspection and repair of the underlying structure.

Repairing the Roof Deck

Once the old shingles are removed, it’s essential to inspect and repair the roof deck. Addressing the condition of the roof deck ensures that the new roofing has a solid and reliable foundation. Any damaged wood should be replaced, and the deck should be made smooth and level to support the new materials.

For very old or heavily damaged roofs, repairing the frame or adding new sheathing may be necessary to maintain structural integrity. Addressing these issues is vital to avoid future problems before the new installation.

Installing Underlayment and Drip Edge

The next step involves installing the underlayment and drip edge. The underlayment is a protective layer that provides moisture and fire protection for the roof deck and roof decking. It acts as a barrier against water penetration, which is crucial for preventing leaks and damage to the underlying structure.

Drip edge flashing is installed along the eaves and valleys to protect these vulnerable areas from water infiltration. The metal drip edge prevents water from running onto the fascia boards and directs it away from the roof, enhancing the overall durability of the roofing system.

Laying New Shingles

With the underlayment and drip edge in place, the next step is laying the new shingles. Start by laying roofing paper over the roof deck to provide additional protection against moisture. Begin shingle installation at the roof edges and work your way up toward the roof peak, ensuring each shingle is securely fastened with roofing nails.

Ensuring proper alignment and spacing is critical to prevent leaks and enhance the longevity of the new roof. Use starter shingles at the edges to create a strong foundation for the first row of shingles, and continue layering until the entire roof is covered.

Adding Flashing and Roof Vents

Adding flashing and roof vents is the final step in the roof replacement process. Flashing is installed around areas prone to leaks, such as chimneys, skylights, and valleys, to provide a watertight seal. Metal flashing is nailed in place and sealed with caulk to prevent water infiltration.

Adequate ventilation is vital for maintaining roofing integrity and preventing premature failure. Ridge vents are installed at the roof ridge to allow hot air to escape from the attic, reducing heat buildup and preventing moisture damage. This step enhances both the roof’s functionality and the comfort of your living environment.

DIY vs. Professional Roof Replacement

When considering a roof replacement, homeowners often weigh the pros and cons of DIY versus hiring a professional. DIY roofing can offer initial cost savings, with materials ranging from $2,500 to $6,300, compared to the average cost of hiring a professional, which ranges between $5,700 to $12,300. However, DIY projects come with significant risks, including the potential for falls, injuries from heavy materials, and improper installation that can void manufacturer warranties.

Professional roofing contractors bring expertise, safety, and efficiency to the table. They can ensure that the roof replacement process is completed correctly and within a reasonable timeframe, often taking between 1 to 3 days depending on the size and complexity of the roof. While the upfront cost may be higher, the long-term benefits of a professionally installed roof often outweigh the initial savings of a DIY project.

While DIY efforts can be cost-effective for minor repairs or maintenance, hiring a professional roofer for major replacements ensures the job is done correctly, avoiding costly mistakes and ensuring the longevity of your new roof.

Cost Considerations for Reroofing

Adding flashing and roof vents is the final step in the roof replacement process.

The cost of reroofing can vary widely based on several factors, including the size of your roof, the materials chosen, and the complexity of the installation. On average, homeowners spend between $5,855 and $13,116 on roof replacements, with the national average being around $10,000. Material and labor costs typically account for 60% and 40% of the total expense, respectively, making the roof replacement cost an important consideration for homeowners.

Geographical location also plays a significant role in roofing costs, as material prices and labor rates can vary across different regions. Additionally, local building codes may require permits, adding to the overall expense. Investing in high-quality materials and professional installation can provide long-term benefits, including better warranties and increased home value.

Manufacturer warranties for asphalt shingles typically range from 20 to 30 years, with premium options offering up to 50-year coverage. These warranties cover defects within the expected lifespan, giving homeowners peace of mind. Grasping these cost considerations helps in budgeting effectively and making informed decisions about your reroofing project.

Enhancing Your Roof with Additional Features

Upgrading your roof with additional features can significantly enhance its functionality and aesthetic appeal. Skylights, for example, can increase natural light in your home, creating a more pleasant living environment and improving energy efficiency. Similarly, ridge vents help in proper ventilation, reducing heat buildup in the attic and preventing moisture damage.

These enhancements not only improve the overall performance of your roofing system but also add to the curb appeal and value of your home. Consider incorporating these features during your roof replacement to maximize the benefits and enjoy a more comfortable and efficient home.

Maintaining Your New Roof

A homeowner inspecting their new roof for maintenance.

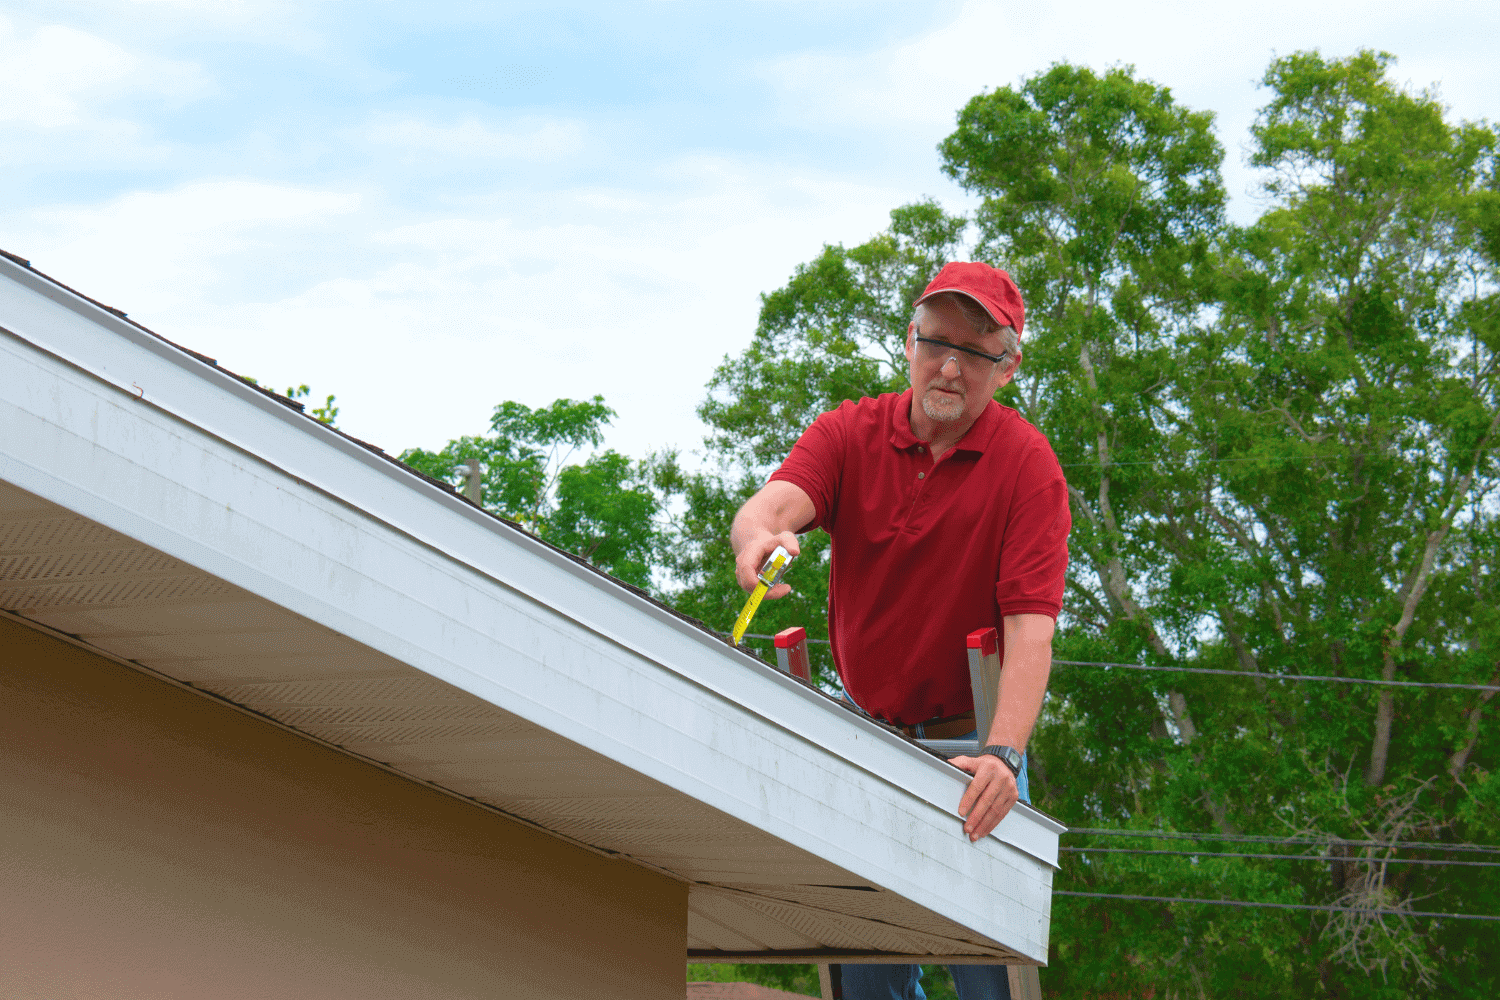
Maintaining your new roof is essential to ensure its longevity and performance. Regular inspections can help identify early signs of damage or leaks, allowing for timely repairs. Cleaning debris from the roof and gutters prevents moisture buildup, which can lead to rot and deterioration.

Adequate attic ventilation prevents heat damage and mold growth, thereby extending the roof’s lifespan. Addressing any issues promptly and ensuring adequate insulation can help maintain energy efficiency and reduce cooling bills.

By following these maintenance tips, you can protect your investment and keep your new roof in excellent condition.

Summary

Reroofing your home is a significant undertaking, but with careful planning and the right information, you can ensure a successful project. From understanding when to reroof and selecting the best materials, to navigating the roof replacement process and considering the costs, each step plays a critical role in protecting your home and enhancing its value.

Remember, whether you choose to take on a DIY project or hire a professional roofing contractor, the key is to make informed decisions that align with your specific needs and budget. By following the guidelines and tips provided in this guide, you can achieve a durable, efficient, and aesthetically pleasing roof that will serve your home for years to come.

Frequently Asked Questions

When should I consider replacing my roof instead of repairing it?

Consider replacing your roof if it is over 20 years old, shows significant damage, or if frequent repairs fail to resolve ongoing issues. This approach ensures long-term protection and peace of mind.

What roofing material is known for balancing durability and cost?

Architectural shingles are known for effectively balancing durability and cost, making them a favored option for homeowners seeking both reliability and aesthetic value.

How long does the roof replacement process usually take?

Typically, a roof replacement takes between 1 to 3 days, contingent on the roof’s size and complexity, as well as weather conditions.

Does a new roof increase a home’s resale value?

A new roof indeed increases a home’s resale value by enhancing curb appeal, improving energy efficiency, and providing prospective buyers with peace of mind. Investing in a new roof can be a wise decision for maximizing your Home’s worth.

What preparations should be made for a roof replacement?

For a roof replacement, it’s essential to clear driveways and outdoor areas, protect attic valuables, and keep pets and children indoors to ensure safety. Taking these precautions will help facilitate a smooth and safe roofing process.

An image showing various types of fascia boards used in home construction.

Fascia Board Basics: Everything Homeowners Need to Know

Fascia boards are horizontal boards along the roof edge. They support gutters and protect your home from weather damage. This guide explains the role of fascia boards, their importance, material options, and maintenance tips related to fascia boards. Understanding the function of the fascia board is essential for any homeowner.

Key Takeaways

  • Fascia boards are crucial for supporting roof structures and protecting attics from weather damage while enhancing a home’s aesthetics.
  • Choosing the right fascia material—wood, PVC, composite, or aluminum—depends on climate, budget, and desired style, impacting durability and maintenance needs.
  • Regular maintenance, including inspections and cleaning, is essential for prolonging the life of fascia boards and ensuring they effectively protect your home.

Understanding Fascia Boards

An image showing various types of fascia boards used in home construction.

Fascia boards are horizontal boards that run along the edge of the roof, providing structural support and contributing to the overall aesthetic of the home. They are a crucial part of the roofing system, playing multiple roles that go beyond mere decoration, including how fascia supports the overall structure.

These boards support the lower edge of roof shingles and secure the gutter system, ensuring that your home remains protected from weather elements and drip edges.

Definition of Fascia Boards

What exactly are fascia boards? These horizontal boards are located at the edge of the roof and are essential in home construction. They connect to the trusses or rafters, providing a secure base for the gutters and sealing off the attic from the elements. This connection helps maintain the structural integrity of the roof, preventing potential damage from water and debris.

In simpler terms, fascia boards act as a barrier between the edge of the roof and external elements. They support the lower edge of roof shingles, preventing them from curling or cracking over time. Without fascia boards, your home would be more susceptible to weather-related damages, making them an indispensable part of any roofing system.

Importance of Fascia Boards

Fascia boards do more than just hold the gutters in place; they seal off the attic from the harsh elements outside. This not only helps in maintaining the structural integrity of your roof but also keeps your attic free from pests and debris. Imagine the chaos without fascia—snow, rain, and even small animals could easily find their way into your attic, causing significant damage.

From a functional standpoint, fascia boards are essential for protecting the roof structure and supporting the gutter system. They prevent weather elements from damaging the roof and help in maintaining the overall structural integrity of your home. Without them, your roof trusses would be exposed, leading to potential rot and decay over time.

But it’s not all about functionality. Fascia boards also play a significant role in the visual appeal of your home. They cover exposed roof trusses, giving the roof a finished and polished look. This enhances the aesthetic value of your home, making it more appealing to potential buyers and increasing its market value.

Common Materials for Fascia Boards

Different materials used for fascia boards displayed together.

Homeowners have several options when it comes to choosing fascia boards:

  • Wood
  • PVC
  • Composite
  • Aluminum

Each material has its pros and cons, and the best choice often depends on your specific needs and local climate conditions.

Understanding these materials will help you make an informed decision that balances aesthetics, durability, and cost.

Wood Fascia Boards

Wood fascia boards provide a traditional and classic look, enhancing the natural aesthetic of a home. Common types of wood used for fascia boards include cedar, redwood, and fir, each known for its natural beauty and durability. However, wood fascia boards require regular upkeep to prevent issues such as wood rot and moisture damage.

While wood offers a timeless appeal, it is prone to rot and requires constant repainting for protection. This makes it a higher-maintenance option compared to other materials. But for those who value a natural look and are willing to invest in regular maintenance, wood fascia boards can be a beautiful addition to any home.

PVC Fascia Boards

PVC fascia boards are a practical choice for homeowners looking for low-maintenance options. These boards are inherently resistant to moisture and insects, making them highly durable. One of the significant advantages of PVC fascia boards is that they can be painted to match the house trim, allowing for customization and a cohesive look.

PVC fascia boards are also resistant to rot, which means less hassle and maintenance over the years. They offer a modern alternative to traditional wood, providing both durability and aesthetic flexibility. Whether you want a sleek, contemporary look or something that blends seamlessly with your existing decor, PVC fascia boards are worth considering.

Composite Fascia Boards

Composite fascia boards are made from recycled materials, offering both durability and eco-friendliness. These boards are known for their strong resistance to weathering, making them an excellent choice for homes in harsh climates. The use of recycled materials also makes composite fascia boards an environmentally friendly option for homeowners.

Besides their durability, composite fascia boards require less maintenance compared to wood. They are resistant to water and moisture, which means they won’t rot or warp over time.

For homeowners looking for a sustainable and long-lasting solution, composite fascia boards are an ideal choice.

Aluminum Fascia Boards

Aluminum fascia boards are known for their lightweight nature and rust resistance. These characteristics make them easy to handle during installation and require minimal maintenance compared to other materials. However, installing aluminum fascia boards may require specialized techniques to ensure proper fit and durability.

One of the significant benefits of aluminum fascia boards is their rust resistance, which means they can withstand harsh weather conditions without deteriorating. This makes them a durable and low-maintenance option for homeowners looking for long-term solutions.

Choosing the Best Material for Your Home

When selecting materials for your fascia boards, several factors must be taken into account. These include climate, budget, and your aesthetic preferences. Understanding the benefits and drawbacks of different materials will help you make an informed decision that suits your specific needs and enhances the overall look of your home.

Climate Considerations

When selecting fascia boards, it’s crucial to consider weather resistance and local climate conditions. For instance, homes in regions with heavy rainfall should opt for materials resistant to moisture, such as PVC or composite boards. On the other hand, areas with high wind and snow loads might benefit from the durability of aluminum fascia boards.

Climate plays a significant role in the longevity and performance of fascia boards. Choosing the right material can protect your home from bad weather and ensure that your fascia boards remain in good condition for years to come. By considering your local climate, you can select a material that not only looks great but also stands the test of time.

Budget Constraints

Budget is another critical factor when choosing fascia boards. Homeowners should factor in both initial costs and long-term maintenance expenses. While wood fascia boards might be cheaper upfront, they require regular upkeep, which can add to the overall cost over time. On the other hand, composite and PVC boards might be more expensive initially but offer lower maintenance costs.

Balancing cost with performance and longevity is key to ensuring that the selected fascia boards meet both budgetary and maintenance needs. By considering both initial and long-term costs, homeowners can make a financially sound choice that doesn’t compromise on durability or aesthetics.

Aesthetic Preferences

The choice of fascia boards can significantly impact the look of your home. When choosing a fascia color, consider the overall color of the home as well as the color of the roof and trim. Selecting fascia trim colors that harmonize with the existing palette can improve visual coherence and enhance curb appeal.

Whether you prefer a bold contrast or a subtle blend, the right fascia can make all the difference.

Installation and Replacement of Fascia Boards

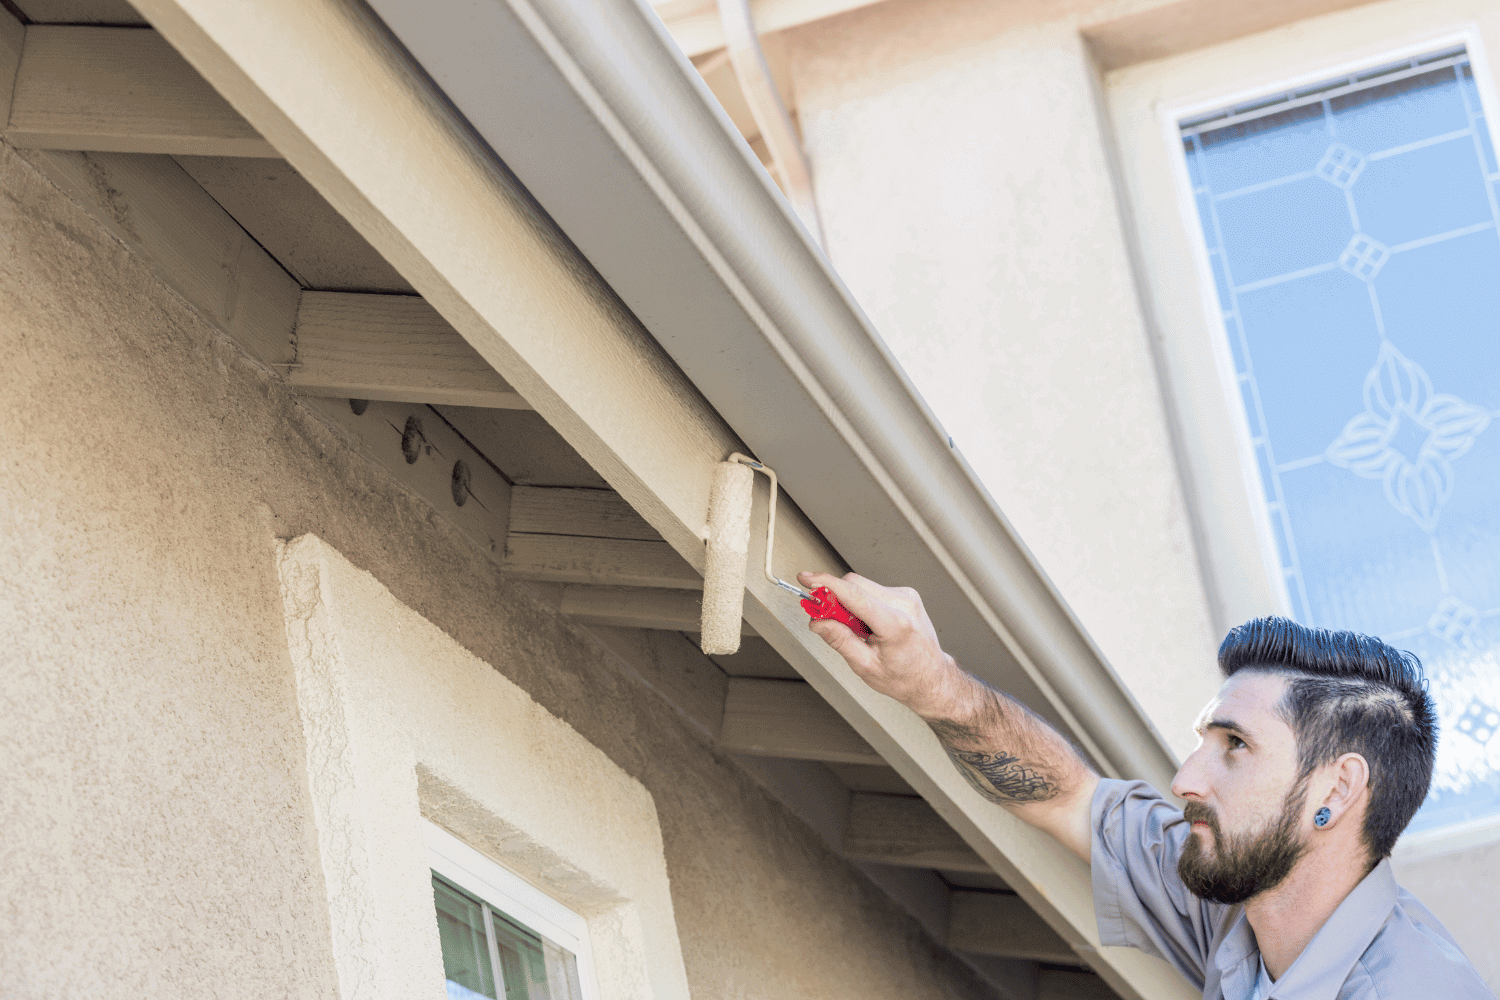
A professional installing fascia boards on a house.

Installing or replacing fascia boards may seem daunting, but understanding the process can make it manageable. Whether you hire a professional or decide to tackle it yourself, proper installation is crucial for the long-term performance of your fascia boards.

Professional Installation

Hiring a professional roofer for fascia installation ensures proper techniques and long-term performance. Professionals use galvanized or anti-corrosion nails to securely attach fascia boards, preventing future issues. Additionally, installing a metal drip edge helps to prevent water damage to the fascia boards.

After cutting new wood for fascia board installation, it’s essential to seal the wood and apply paint to protect it from moisture. This ensures that the fascia boards are installed properly and remain in good condition for years to come.

Trusting a professional can save you time and ensure that the job is done right.

DIY Installation Tips

For those who prefer a hands-on approach, DIY installation is possible with the right tools and knowledge. Accurate measurement and cutting of the new fascia board are essential to ensure it fits properly and spans at least two rafters for stability. This provides the necessary support and prevents the fascia board from sagging over time.

Sealing the seams against water is another critical step in DIY installation. Using silicone caulk to seal the seams helps prevent water damage and extends the life of the fascia boards.

With careful planning and execution, DIY installation can be a rewarding project that enhances your home’s exterior.

Signs It’s Time to Replace Fascia Boards

Knowing when to replace fascia boards can prevent more significant issues down the line.

Common indicators that it’s time to replace fascia boards include:

  • Cracked or curling roof shingles
  • Peeling paint
  • Leakages
  • Discoloration

If your fascia boards are too damaged or weak, they should be replaced as soon as possible to avoid further issues.

Replacing damaged fascia boards not only restores functionality but also enhances the appearance of your home. If your fascia boards detract from the home’s look or are showing signs of significant wear and tear, it’s time for a replacement. Keeping an eye out for these signs can help you maintain the integrity of your roof and overall home structure.

Maintaining Your Fascia Boards

A well-maintained fascia board showing no signs of damage.

Maintaining fascia boards is essential for preventing moisture infiltration and protecting your home from water-related damage. Regular maintenance can extend the life of your fascia boards and keep them looking good for years to come.

Regular Inspections

Inspecting fascia boards at least once or twice a year is crucial for identifying decay indicators like discoloration or soft spots. Homeowners should look for signs of sagging or drooping, which indicate water damage. Visual checks for cracks, holes, or gaps in fascia boards are also essential in maintaining their structural integrity.

Regular inspections help in early detection of potential issues, allowing for timely repairs and preventing extensive damage. By keeping an eye on your fascia boards, you can ensure they remain in good condition and continue to protect your home.

Cleaning and Painting

Cleaning and painting fascia boards are essential maintenance tasks. Wrapping fascia boards in metal is a recommended method to protect them from moisture damage. Sealed and painted fascia boards should be maintained occasionally to ensure they remain in good condition.

One effective method for cleaning fascia boards involves using gentle soap and water to remove dirt and debris. This not only keeps the boards looking fresh but also helps in identifying any areas that might need touch-ups or repairs.

Regular cleaning and painting can significantly extend the lifespan of your fascia boards.

Gutter Maintenance

Maintaining clean gutters is crucial as they support the fascia boards and protect the roof structure from weather damage. Signs that gutters need replacement include sagging gutters, which can place excess stress on the fascia boards, potentially leading to further damage. Homeowners should perform regular inspections of gutters for debris accumulation and clean them periodically to prevent water damage.

Cleaning gutters can include using a garden hose to flush out debris and checking for proper attachment to ensure they remain securely fastened. Regular gutter maintenance helps prevent clogs that can cause water overflow, leading to fascia board damage, affecting all the guttering.

By keeping your gutters in good condition, you ensure the longevity and effectiveness of your fascia boards.

Enhancing Curb Appeal with Fascia Trim

A beautifully designed fascia trim enhancing the curb appeal of a home.

Fascia boards provide more than just functional benefits; they also enhance the visual appeal of your home by concealing roofing materials and creating a polished edge. Matching fascia materials to other exterior elements can enhance cohesive design, impacting Home value and curb appeal.

The right house fascia trim can dramatically improve the overall look of your home’s exterior and make it more attractive to potential buyers.

Decorative Fascia Trim Options

Decorative fascia trim can feature various designs that align with different architectural styles, from intricate patterns to minimalist designs. Layered decorative fascia trim can add dimension and strength to the home’s exterior. For those who prefer a more subtle approach, fascia trim can ensure a smooth transition to the soffit without drawing excessive attention.

Whether you opt for ornate designs or simple, clean lines, decorative fascia trim can enhance the beauty of your home. The right trim can complement your home’s architecture and reflect your personal style, providing a unique touch that sets your home apart from others in the neighborhood.

Color Coordination

Choosing the right color for fascia boards contributes significantly to the overall curb appeal and visual harmony of your home. Matching fascia colors with the trim, gutters, and siding creates a cohesive and well-designed exterior look. Effective color coordination can enhance curb appeal, making your home stand out positively in the neighborhood.

Exploring different decorative fascia trim colors can add character and individuality to your home’s exterior. Whether you choose to match or contrast colors, the right combination can make a substantial difference in enhancing the aesthetic appeal of your home.

Summary

Fascia boards are an essential component of any home, providing both structural support and aesthetic appeal. From wood to PVC and composite materials, choosing the right fascia boards involves considering various factors such as climate, budget, and personal preferences. Proper installation and regular maintenance are key to ensuring that your fascia boards remain in good condition and continue to protect your home from weather-related damage.

By understanding the importance of fascia boards and how to maintain them, homeowners can enhance the longevity and appearance of their homes. Whether through professional installation or DIY efforts, keeping fascia boards in top shape is an investment in the durability and beauty of your home. Remember, a well-maintained fascia not only protects but also enhances the overall curb appeal of your Home.

Frequently Asked Questions

What is the difference between a trim board and a fascia board?

A trim board frames windows and doors, giving your home a finished look, while a fascia board covers the edges of the eaves, providing protection and support for the roof. Each serves a unique purpose in enhancing your home’s exterior.

What are fascia boards, and why are they important?

Fascia boards are crucial as they sit at the edge of your roof, supporting shingles and holding up gutters while protecting your roof structure from weather damage. Without them, you risk structural issues and water damage.

What are the common materials used for fascia boards?

Fascia boards typically use materials like wood, PVC, composite, and aluminum. Your choice will depend on your budget and how much maintenance you’re willing to handle!

How can I tell if my fascia boards need to be replaced?

If you notice cracked or curling shingles, peeling paint, leaks, or discoloration, it’s a clear sign your fascia boards may need replacement. Don’t wait too long—addressing these issues can save you from bigger problems down the line.

How often should I inspect my fascia boards?

You should inspect your fascia boards at least once or twice a year to catch any signs of decay like discoloration or sagging. Regular checks will keep them in good shape and looking great!

Signs indicating over insulation in a home.

Can You Over Insulate a House?

Can you over insulate a house? Yes, it’s possible to have too much insulation, and it can lead to several problems. Over-insulating can cause moisture buildup, poor air quality, and even increased energy costs. This article will explore how to identify if your home is over-insulated and the impact it can have.

Key Takeaways

  • Over-insulation can lead to moisture buildup, reduced air quality, and increased energy costs due to strain on HVAC systems.
  • Climate and R-values play a critical role in determining the appropriate amount of insulation needed for energy efficiency.
  • A professional energy audit can help identify insulation deficiencies, guiding homeowners toward optimal thermal performance and significant long-term savings.

Understanding Over Insulation

An illustration showing the concept of over insulation in a house.

The primary purpose of insulation is to maintain a stable temperature within your home by reducing airflow, ultimately saving energy and lowering heating and cooling costs. However, when insulation is overdone, it can lead to diminishing returns. Spending money on excessive insulation that doesn’t provide additional benefits is not just wasteful but also counterproductive.

Optimal insulation is about finding the right balance between upfront costs and long-term energy performance. Regional building codes provide guidelines, but they don’t always represent the ideal amount of insulation for your particular situation. While more insulation might seem beneficial, it can sometimes require manual ventilation to prevent moisture buildup, compromising its effectiveness.

Understanding over-insulation helps you avoid unnecessary expenses and potential issues from excessive insulation. Achieving the right balance ensures your home is comfortable, energy-efficient, and free from moisture and mold problems.

Signs of Over Insulation in Your Home

Signs indicating over insulation in a home.

Excess insulation can manifest in various ways, often creating discomfort and even health issues. One of the primary signs of too much insulation is moisture buildup. This can lead to mold growth, which poses serious health risks to the occupants. The trapped moisture can cause structural damage over time, leading to costly repairs.

Another telltale sign is poor indoor air quality. When airflow is blocked due to over-insulation, it can result in stale, stuffy air and potential respiratory issues. This is particularly concerning in homes where proper ventilation is not in place to counteract the effects of over-insulation.

Proper ventilation is crucial for maintaining indoor air quality. Without it, the humidity levels in your home can skyrocket, leading to a range of problems from structural damage to health issues. Identifying these signs early allows for corrective measures before problems escalate, including the installation of roof vents.

The Role of Climate in Insulation Needs

Climate plays a significant role in determining how much insulation your home needs. The insulation requirements can vary drastically from one region to another, influenced by factors like temperature fluctuations and humidity levels. For instance, in hot climates, insulation typically requires less than 10 inches to be effective.

Different regions have specific R-values that are recommended based on climate zones. These R-values indicate the thermal resistance of the insulation material, helping to control heat flow and improve energy efficiency. Meeting or exceeding these recommendations helps avoid energy loss and maintains a comfortable indoor environment.

Building codes often fall short in reflecting the unique insulation needs of different climates. They can provide a false sense of security, leading to potential under-insulation in some regions. Considering factors like thermal performance and specific energy modeling is important when determining the right amount of insulation for your home.

Impact on HVAC System and Energy Bills

An HVAC system affected by insulation issues.

Over-insulation can have a significant impact on your HVAC system, forcing it to work harder and longer to maintain the desired temperatures. This increased workload can lead to higher energy bills, as the system consumes more energy to keep your home comfortable. It’s a classic case of diminishing returns where adding more insulation doesn’t necessarily equate to more savings.

Poor air circulation caused by over-insulation can result in uneven temperatures across different rooms in your home, leading to warm air pockets. This not only affects comfort but also puts additional strain on your HVAC system, further driving up energy costs. Proper insulation can significantly reduce heat transfer, heating and cooling costs, potentially lowering energy bills by around 15%.

The right insulation balance ensures your HVAC system operates efficiently, maintaining a comfortable indoor environment without high energy costs. This balance is key to enjoying the full benefits of insulation without the drawbacks of over-insulation.

Balancing Insulation for Optimal Performance

A well-balanced insulation system offers numerous benefits, from enhancing indoor air quality to reducing drafts and improving overall comfort. When your home is properly insulated, your HVAC system doesn’t have to work as hard, which can extend its lifespan and reduce maintenance costs.

Understanding R-values is key to achieving optimal insulation. The R-value measures the thermal resistance of an insulation material, and higher R-values provide better insulation. Additionally, sealing air leaks around vents and pipes can significantly improve energy efficiency and reduce heat loss. This combination of proper insulation and air sealing can save homeowners between 10% and 20% on energy costs annually.

Professional installation ensures correct and efficient application of insulation installed. Experienced professionals can identify less obvious areas needing insulation, such as around ductwork, pipes, and electrical outlets. This comprehensive approach helps maintain a stable indoor temperature and promotes environmental sustainability.

Professional Assessment and Recommendations

A professional home energy audit is an invaluable tool for assessing your home’s energy consumption and identifying inefficiencies. During the audit, energy assessors conduct a thorough review of your home’s insulation and heating systems, pinpointing areas that require improvement.

The results from a home energy audit can guide you on necessary insulation improvements, helping you achieve optimal thermal performance and energy efficiency. Addressing air leaks and moisture issues identified during the audit can further enhance the effectiveness of your insulation.

Professional assessments ensure your insulation project is based on accurate data and tailored to your needs. This approach improves comfort and maximizes the return on investment from insulation efforts.

Benefits of Proper Insulation Installation

Benefits of proper insulation installation in a home.

The financial benefits of proper insulation installation are substantial. For example, a $2,000 investment in insulation could yield savings of approximately $20,000 over 50 years. In cold climates, the return on investment (ROI) for adding insulation can be as short as five years.

Proper insulation improves overall home comfort by maintaining a stable temperature, reducing drafts, and minimizing noise levels. This not only enhances the living environment but also contributes to significant energy savings. Installing AttiCat blown-in insulation, for instance, can save homeowners as much as 20% on their energy bills.

Beyond financial and comfort benefits, proper insulation also promotes environmental sustainability. By reducing energy consumption, you lower your home’s carbon footprint, contributing to a greener planet.

Choosing the Right Insulation Material

Different types of insulation materials for homes.

Choosing the right insulation material is crucial for achieving the desired thermal performance. The R-value, which measures insulation effectiveness, depends on various factors, including the type of insulation, its thickness, and density. Spray foam insulation, for instance, has a high R-value and provides a strong air barrier, making it highly effective for minimizing energy loss.

Cellulose insulation, typically made from recycled newsprint, offers environmental benefits and is effective for retrofitting spaces. Mineral wool insulation, made from rock or slag, provides excellent fire resistance and soundproofing capabilities. Foam board insulation and structural insulated panels (SIPs) are also highly effective, often providing up to twice the thermal resistance of other materials.

Choosing the right insulation material involves considering factors like climate, specific insulation needs, and energy efficiency goals. This tailored approach ensures optimal insulation performance and long-term benefits.

Addressing Common Insulation Issues

Common insulation issues, such as ice dams and moisture problems, can indicate underlying performance issues. Ice dams, for instance, often occur in winter and can be a sign of poor insulation. Excessive insulation can trap heat, leading to increased humidity and potential mold problems.

To address these issues, it’s essential to have a vapor barrier underneath attic insulation to prevent moisture from reducing its effectiveness. Proper ventilation is also crucial to prevent indoor air pollution when sealing a home. A vented attic can help improve airflow, and temporary solutions like roof heat cables can help prevent ice build-up, but they don’t address the underlying insulation issues.

A comprehensive approach to addressing insulation issues involves regular inspections and maintenance. Identifying and fixing these problems early ensures your home remains comfortable, energy-efficient, and free from costly repairs.

Summary

In summary, while insulation is crucial for maintaining a comfortable and energy-efficient home, over-insulating can lead to various problems. From moisture buildup and poor indoor air quality to increased HVAC system workload and higher energy bills, the consequences of too much insulation are significant. Achieving a balance is key to enjoying the full benefits of insulation without the drawbacks.

Proper insulation involves understanding your home’s specific needs, considering the climate, and choosing the right materials. Professional assessments and tailored recommendations can guide you in optimizing your home’s insulation, ensuring long-term comfort and energy savings. Take action today to improve your home’s insulation and create a more sustainable living environment.

Frequently Asked Questions

Is it okay to double up insulation?

Yes, doubling up insulation can significantly improve the R-value, making it an effective strategy to enhance energy efficiency and meet insulation standards.

Can a home have too much insulation?

Yes, a home can have too much insulation, which may cause issues such as moisture buildup, poor indoor air quality, and higher energy costs. It’s essential to ensure a balanced insulation approach for optimal performance.

What are the signs of over-insulation in a home?

Over-insulation in a home is indicated by moisture buildup, blocked airflow, poor indoor air quality, and uneven temperatures in different rooms. Addressing these issues promptly can help maintain a comfortable living environment.

How does climate affect insulation needs?

Climate directly influences insulation requirements, as various regions demand specific R-values to effectively address temperature changes and humidity fluctuations. Understanding your local climate is crucial for optimizing energy efficiency in your home.

How can over-insulation impact the HVAC system and energy bills?

Over-insulation can strain your HVAC system, resulting in higher energy bills and inconsistent temperature distribution throughout your home. It’s essential to balance insulation to maintain efficiency.

Different types of foundation cracks that require attention.

Foundation Cracks to Be Concerned About: When to Take Action

Are you seeing cracks in your foundation and wondering which ones to be concerned about? It’s important to know which foundation cracks indicate serious problems. In this article, we’ll guide you through the types of foundation cracks to be concerned about, what they signify, and when to take action.

Key Takeaways

  • Foundation cracks to monitor include horizontal cracks, vertical cracks wider than 1/4 inch, stair-step cracks, and diagonal cracks, each indicating varying levels of structural concerns.
  • Early detection of foundation issues, such as sticking doors, uneven floors, and visible gaps, is crucial for preventing significant structural damage and costly repairs.
  • Preventive measures, including proper grading, drainage, regular maintenance, and mindful landscaping, are essential to maintaining foundation integrity and avoiding future problems.

Types of Foundation Cracks That Require Attention

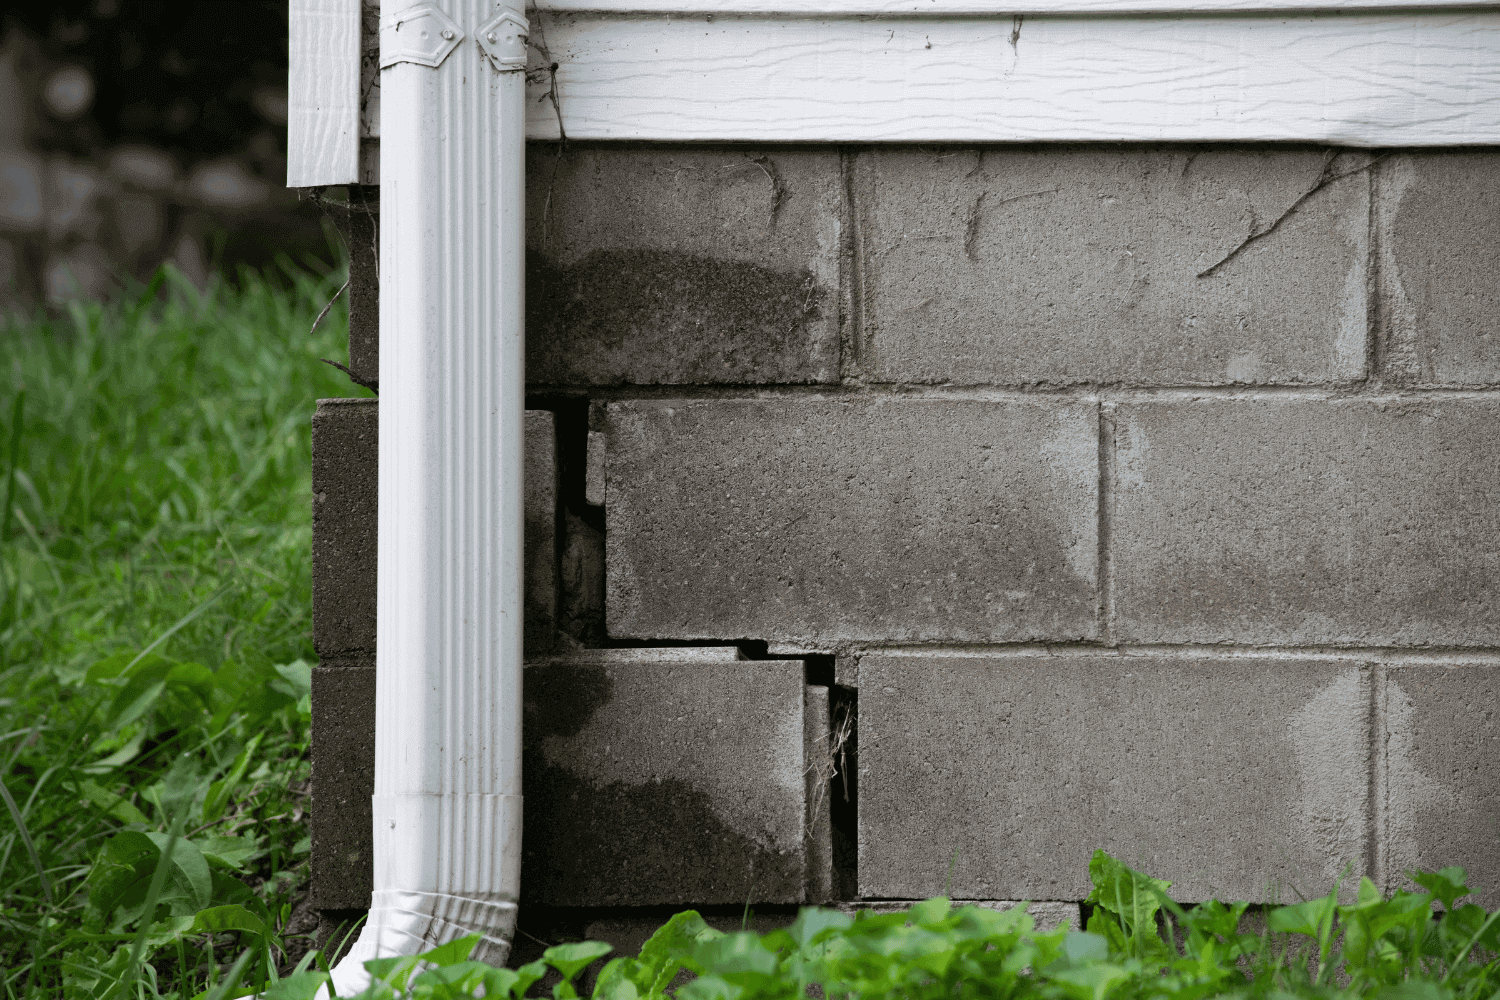
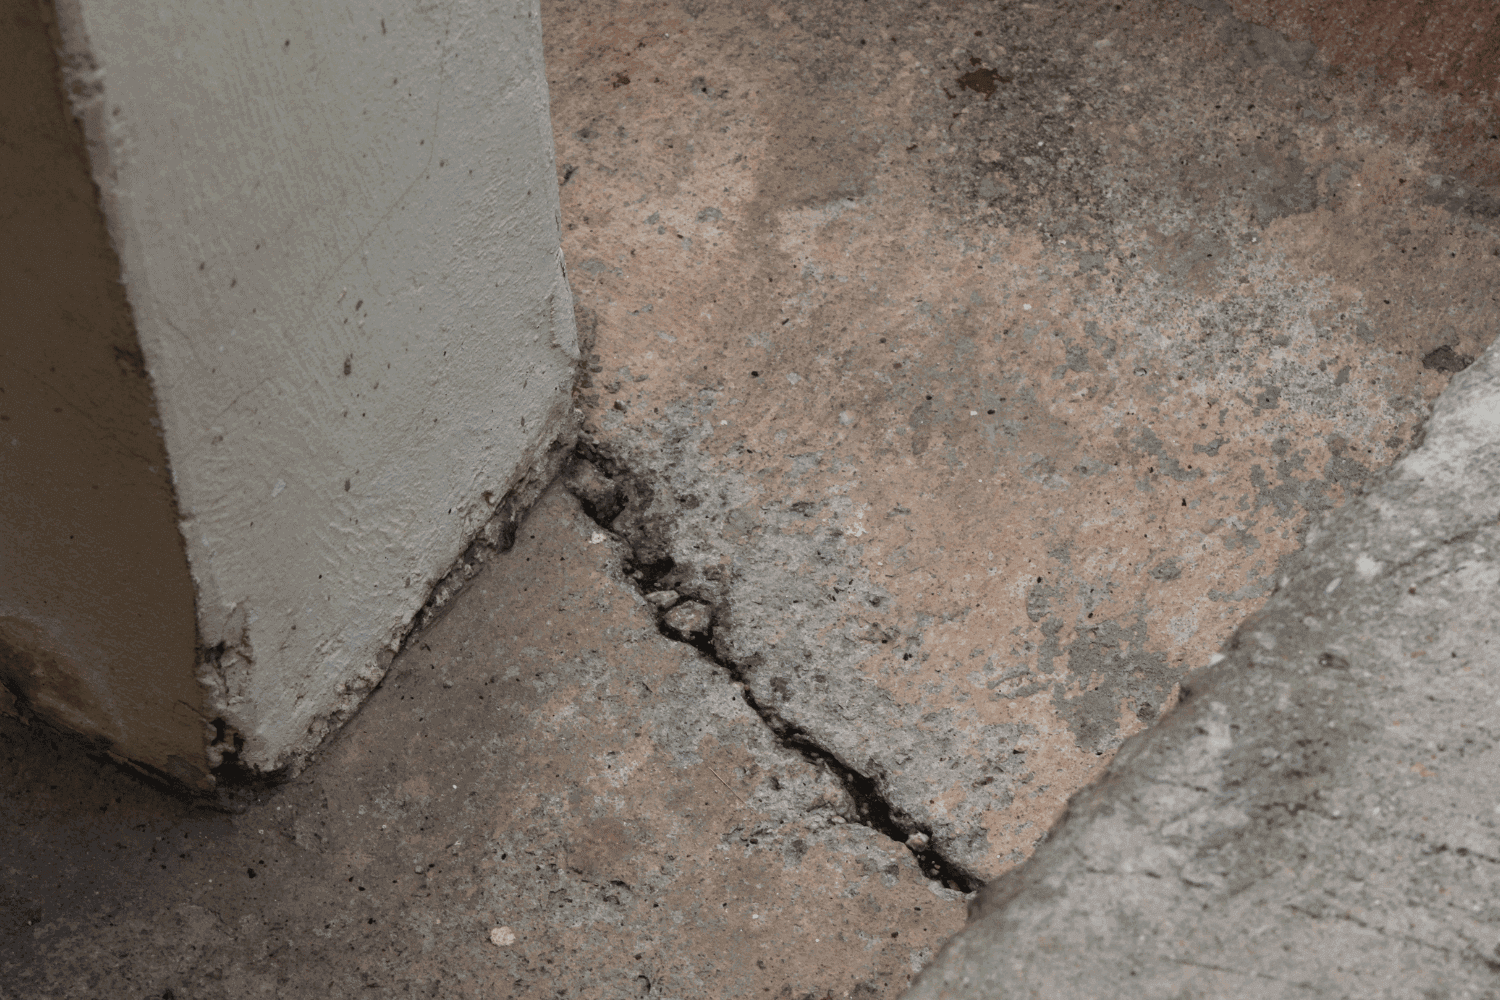
Different types of foundation cracks that require attention.

Foundation cracks come in various shapes and sizes, each indicating different levels of concern. The most common types to watch out for include horizontal cracks, vertical cracks wider than 1/4 inch, stair-step cracks, and diagonal cracks. These cracks can appear in a concrete foundation, block foundations, or basement walls, and each type can signify underlying structural foundation cracks that may worsen if left untreated.

Keeping track of these cracks is important as they can evolve into more serious structural problems if neglected. Horizontal cracks and hairline cracks, as well as those wider than 1/4 inch, in particular, require immediate attention as they often indicate serious structural problems.

Always keep an eye on any changes in the cracks, as widening gaps can be a sign of worsening foundation issues.

Horizontal Cracks

Horizontal cracks run left to right along foundation walls and are commonly found in both concrete and block foundations. These cracks are a significant red flag as they often indicate serious structural issues. The presence of horizontal cracks can suggest that the foundation walls are bowing inward due to soil pressure or hydrostatic pressure from excess water. This type of foundation crack can lead to water leakage and further compromise the structural integrity of your home if not addressed promptly.

If you spot horizontal cracks in your foundation walls, immediate action is required. These cracks can cause considerable foundation bowing and other major structural issues. Addressing horizontal cracks early can avert more extensive and expensive repairs later.

Stair-Step Cracks

Stair-step cracks, usually following mortar joints in block foundations, clearly indicate serious structural issues. These cracks form a pattern resembling a staircase, hence the name.

Stair-step cracks often indicate severe structural problems that require immediate attention to prevent further damage.

Vertical Cracks Wider Than 1/4 Inch

Vertical cracks wider than 1/4 inch indicate more than just settling; they suggest potential underlying structural problems. These cracks need a professional evaluation to determine the extent of the issue and the necessary repairs.

Ignoring such cracks can lead to more significant foundation damage and costly repairs in the future.

Diagonal Cracks

Diagonal cracks often indicate rotating walls due to structural failure. They can result from the natural curing process of concrete or differential settlement over time. Monitor these cracks closely, especially if you notice uneven or sloping floors, which can further indicate foundation movement.

Use a marble test to check the levelness of your floors if you suspect any foundation issues.

Identifying Structural Issues Early

Signs of structural issues in a foundation.

Detecting structural issues early is crucial to prevent severe foundation problems. Signs of potential foundation issues include sticking doors and windows, uneven floors, and visible gaps between walls, ceilings, and floors. Identifying these signs early can help you address the root cause before it escalates.

Regular inspections and maintenance are essential for maintaining the structural integrity of your home. Implementing a foundation maintenance plan and conducting biannual inspections, especially after extreme weather events, can help identify new or changing cracks early. Promptly addressing these issues can save you from costly repairs and ensure your home’s safety.

Sticking Doors and Windows

Difficulty operating doors and windows can be an early sign of foundation movement or settlement. When doors and windows start sticking or become hard to open and close, it often indicates that the foundation is shifting, causing frames to become misaligned. This is a red flag for potential structural issues that need to be addressed.

Uneven Floors

Uneven floors are another common indicator of foundation problems. Poorly compacted soil before construction can lead to uneven settling, resulting in pressure and cracks. To check for uneven floors, place a marble on the floor and observe its movement.

If it rolls to one side, it indicates a slope, which could signify foundation issues.

Visible Gaps and Separation

Visible gaps between walls, ceilings, and floors clearly indicate foundation movement. These gaps suggest that the foundation may be shifting or settling, which can affect your home’s overall structural integrity.

Regularly monitoring these gaps is important, as any changes may require professional evaluation or repair to prevent further damage.

Causes of Foundation Damage

Causes of foundation damage including water-related problems.

Understanding the causes of foundation damage helps in preventing future issues. The main causes include soil pressure, water-related problems, and frost heave. Poor drainage can lead to hydrostatic pressure, pushing against foundation walls and causing cracks. Effective water management and drainage solutions reduce the risk of foundation damage.

Foundation settlement can be influenced by factors such as construction materials, soil type, and water presence. Freezing and thawing cycles can also contribute to foundation cracks by causing soil expansion. Understanding these causes can help you take preventive measures to protect your foundation.

Soil Pressure and Settlement

Soil pressure and settlement significantly contribute to foundation damage. The expansion and contraction of clay soils due to moisture changes exert pressure on foundation walls, leading to cracks. Poor drainage and inadequate soil compaction can worsen these issues, causing uneven settling and structural problems.

Water-Related Problems

Excess water draining toward the foundation creates significant pressure against the walls, leading to structural issues. Poor drainage can cause water to accumulate around the foundation, resulting in shrinkage and wet non-structural cracks.

Effectively managing water runoff is important to prevent these problems.

Frost Heave

Frost heave occurs due to the freezing and thawing of soil around the foundation. These cycles cause soil to expand, creating pressure on the foundation and resulting in cracks.

Repeated freezing and thawing can significantly impact the foundation’s structural integrity, so it’s important to address any resulting cracks promptly.

Repairing Foundation Cracks

Repairing foundation cracks with epoxy injection.

Repairing foundation cracks promptly prevents further structural damage. Various methods can be used depending on the type and severity of the crack. Expanding polyurethane is highly effective for sealing cracks due to its waterproofing and flexibility properties. Choosing the right repair method can significantly impact the longevity and effectiveness of the repair.

Addressing foundation cracks as soon as they are detected can save you from more extensive and costly repairs in the future. Understanding how to fix foundation cracks and selecting the foundation crack repair method that best suits your specific needs is crucial to prevent foundation cracks.

Epoxy Injection

Epoxy resin injections are commonly used to seal minor foundation cracks and prevent water intrusion. This method is particularly effective for vertical cracks and can cost between $500 to $900 for professional repair.

Regularly monitoring vertical cracks and addressing them with epoxy injection can prevent further structural issues.

Hydraulic Cement Application

Hydraulic cement is a fast-setting material ideal for repairing leaking cracks in foundations. Clean the area around the crack, mix the cement according to the instructions, and press it firmly into the crack to ensure a secure seal.

As it cures, hydraulic cement expands, blocking water from seeping through and providing a durable, watertight seal.

Carbon Fiber Reinforcement

Carbon fiber reinforcement strengthens foundation walls, particularly those compromised by structural issues. Carbon fiber strips bond the distance between cracks, increasing the structural strength of the foundation wall. These reinforcements are ten times stronger than steel and provide a lightweight yet highly effective solution for preventing further damage.

Preventing Future Foundation Issues

Preventing future foundation issues through proper landscaping.

Preventing foundation issues is better than dealing with costly repairs. Most foundation problems arise from water-related issues, leading to soil swelling or shrinkage that destabilizes the foundation. Implementing preventive measures helps maintain your foundation’s integrity and avoid future problems.

Proper grading and drainage solutions, regular maintenance, and smart landscaping choices are key to preventing foundation issues. Taking these steps protects your home and ensures its structural stability.

Proper Grading and Drainage Solutions

Proper grading around your home should guide water away from the foundation, preventing soil expansion. Create a slope of at least one inch per foot for the first 5 to 10 feet away from the foundation.

Ensure that soil does not contact the siding or wood of the house, with at least four inches of the foundation visible above the soil.

Regular Maintenance Tips

Regular maintenance is essential for identifying potential issues early. Inspect the foundation for new or changing cracks and address minor issues promptly to prevent them from developing into significant problems.

If you spot water or moisture from a crack, act quickly to prevent further damage.

Landscaping Considerations

Landscaping plays a vital role in preventing foundation issues. Keep plants and trees a safe distance from the foundation to prevent root damage and moisture accumulation. Plant trees at least 15 feet away from the foundation to avoid these problems.

Summary

In conclusion, understanding the types of foundation cracks, identifying early signs of structural issues, knowing the causes of foundation damage, and implementing preventive measures are crucial for maintaining your home’s structural integrity. By addressing foundation problems promptly and effectively, you can ensure the safety and stability of your home. Remember, A&M Home Services is here to help with reliable, affordable, and effective foundation repair solutions.

Frequently Asked Questions

What are the common types of foundation cracks to watch out for?

It’s important to watch for horizontal cracks, vertical cracks wider than 1/4 inch, stair-step cracks, and diagonal cracks, as they may indicate underlying structural issues. Monitoring these types of cracks can help ensure the integrity of your foundation.

How can I identify early signs of structural issues in my home?

To identify early signs of structural issues in your home, be vigilant for sticking doors and windows, uneven floors, and visible gaps between walls, ceilings, and floors. These indicators can help you address potential problems before they worsen.

What causes foundation damage?

Foundation damage is primarily caused by soil pressure, water-related issues, and frost heave, with poor drainage and freeze-thaw cycles also playing significant roles. Addressing these factors early can help prevent serious structural problems.

What are some effective methods for repairing foundation cracks?

Effective methods for repairing foundation cracks include epoxy injection to seal small cracks, applying hydraulic cement for wider gaps, and using carbon fiber reinforcement for added support. These solutions can help ensure the integrity of your foundation.

How can I prevent future foundation issues?

To prevent future foundation issues, ensure proper grading and drainage around your home, maintain regular landscaping, and keep plants and trees at a safe distance from the foundation. Taking these proactive steps is essential for maintaining a stable foundation.

Tools and materials used for cutting and trimming the ridge cap.

Ultimate Guide to Steel Roof Ridge Cap Installation

Ultimate Guide to Steel Roof Ridge Cap Installation

Need to install a steel roof ridge cap installation? This guide covers every step, from understanding its importance to the final touches. Learn how to protect your roof effectively with our straightforward installation tips.

Key Takeaways

  • Steel roof ridge caps provide essential protection against water damage and wind uplift, ensuring the integrity of metal roofing systems.
  • Proper installation requires specific tools and adequate preparation, including leaving a gap for alignment and using sealants for waterproofing.
  • Regular inspections and maintenance of the ridge cap post-installation are crucial for extending its lifespan and preventing significant repairs.

Understanding Steel Roof Ridge Caps

An overview of steel roof ridge caps and their importance in roofing.

Steel roof ridge caps are trims installed along the peak of the roof, serving as the critical finishing touch that seals the joint between two roof slopes. They protect your roof from water damage and wind uplift, keeping your home dry and secure. Properly installed ridge caps prevent water from entering the roofing system, thereby safeguarding the interior of your home.

Common materials for metal roof ridge caps include aluminum and steel, chosen for their durability and resistance to the elements. These materials are designed to withstand the harshest weather conditions, providing long-lasting protection for your roof. The ridge cap’s role in a metal roofing system cannot be overstated, as it is instrumental in maintaining the roof’s overall integrity. Additionally, the metal roofing ridge cap plays a crucial part in this process.

Metal roof ridge caps come in two main varieties. These include closed ridge caps and vented ridge caps. Closed ridge caps are designed to completely seal the roof peak, providing maximum protection against water infiltration. On the other hand, vented ridge caps allow moisture to escape from the roof space while still offering essential weather protection. Understanding the differences between these types is crucial for selecting the right ridge cap for your metal roofing project.

Tools and Materials Needed for Installation

Embarking on a metal roofing project requires the right tools and materials to ensure a successful installation.

Essential tools for installing a metal roof ridge cap include:

  • Cutting snips
  • A carpenter’s pencil
  • Cut-resistant roofing gloves
  • A caulking gun
  • Silicone sealant

These tools will help you measure, cut, and secure the ridge cap accurately, ensuring a professional finish.

Safety is paramount when working on a roof, so make sure to use safety equipment such as gloves and goggles to protect yourself. Additionally, metal-to-metal screws with sealing washers are necessary to secure the ridge cap properly.

It’s also crucial to read the manufacturer’s installation guide before starting the project to ensure you follow all guidelines and achieve a successful installation.

Preparing for Installation

Proper preparation is key to a successful installation process. Ridge caps are critical components that seal the joint between two roof slopes, preventing leaks and deterioration. They prevent water infiltration, safeguarding the interior from potential damage. A clean roof surface before installation is essential for strong adhesion of the ridge cap.

One important step is to leave a 2-inch gap between metal roofing panels at the peak to maintain alignment and allow for adjustments. This gap ensures that the ridge cap can be installed correctly and provides room for any necessary adjustments during the installation process. For non-vented ridge cap installations, foam closure strips seal gaps and prevent water infiltration.

For closed ridge caps, it’s necessary to prep the Z-trim underneath before installation. This preparation ensures that the ridge cap sits correctly and provides a secure seal. Taking these preparatory steps seriously will set the stage for a smooth and successful installation.

Cutting and Trimming the Ridge Cap

Tools and materials used for cutting and trimming the ridge cap.

Cutting and trimming the ridge cap to fit your roof accurately is a crucial part of the installation process. Begin by measuring the ridge line’s length and width to ensure the ridge cap fits perfectly. Using a speed square, align it with the roof’s pitch before marking a cutting line on the ridge cap. This step ensures that your cuts are precise and the ridge cap aligns correctly with the roof’s angles.

To trim the ridge cap ends, create a one-inch mark, pry open the hems, and cut away one inch from each side. Then, fold the cut side down at a 90-degree angle to create a proper fit at the gable trim ends. This folding technique ensures that the ridge cap fits snugly and provides a clean finish at the roof edges. It’s also essential to smooth any rough edges or corners after cutting to ensure safety during installation and to prevent any potential damage to the roof.

Preparing the edge of the ridge cap properly is often considered the hardest part of the process, but it’s crucial for a successful installation. Accurate measurement and trimming ensure the ridge cap fits perfectly and provides maximum protection for your roof.

Installing the Ridge Cap

A worker installing a metal roof ridge cap.

The installation process for a ridge cap begins with careful placement and alignment. Start by positioning the ridge cap along the ridge line, ensuring that there is room for expansion and contraction. Apply sealant tape along the ridge line to create a waterproof barrier where the ridge cap meets the panels. This step prevents water intrusion and ensures the longevity of the roof.

Techniques for attaching ridge caps depend on the type of closure, whether closed or vented. Overlap the ridge cap by a recommended 6 inches for proper sealing when the roof exceeds the typical length of the ridge cap.

The following subsections will detail the specific steps for securing closed ridge caps and installing vented ridge caps.

Securing Closed Ridge Caps

Securing closed ridge caps involves using butyl tape sealant to enhance the installation. This tape creates a waterproof seal, preventing any water from seeping through the ridge cap. Place the tape sealant along the edges of the ridge cap and press it firmly to ensure a tight seal.

Once the tape is in place, attach the ridge cap at regular intervals with screws, ensuring that it is securely fastened to the roof. This method provides a robust seal and prevents any movement of the ridge cap, maintaining the integrity of the roof structure.

These steps ensure closed ridge caps are installed correctly, providing maximum water and wind protection to install ridge cap correctly during ridge cap installation.

Installing Vented Ridge Caps

Vented ridge caps being installed on a metal roof.

Installing vented ridge caps begins with proper positioning to ensure adequate airflow and moisture escape. Start by marking the installation location and making a cut 2 inches on either side of the centerline of the ridge. This cut allows for the vented ridge cap to fit correctly and perform its function of venting moisture from the roof space.

Position the vented ridge cap by aligning it with the marked installation location and securing it using an anchor clip system and tape seal. This system ensures that the vented ridge cap stays in place and provides a secure fit. After placing the profile vent, fasten the ridge cap to the clips with screws at regular intervals along its length.

Unlike closed ridge caps, ventilated ridge caps do not require sealant around the heads of screws. Follow the manufacturer’s specifications to ensure the vented ridge cap allows for adequate airflow and moisture escape. Adjust specialized closures as needed during the installation to accommodate the venting requirements.

Finishing Touches and Inspection

Once the ridge cap is installed, performing finishing touches and inspections is essential to ensure long-term effectiveness. Regular inspections can catch early signs of ridge cap damage, such as dents or rust, which could escalate into major repairs if left unchecked. After installation, ensure all screws are tightened to prevent potential leaks and maintain the roof’s integrity.

Inspecting and resealing the ridge cap regularly can significantly extend its lifespan. Performing these inspections and maintenance tasks ensures that your metal roof continues to protect your home effectively against weather and water damage.

Additional Tips for Successful Installation

For a successful installation process, consider choosing a ridge cap that complements the color and style of your metal roofing. This not only ensures a unified look but also enhances the overall aesthetic of your home.

Attention to detail in selecting materials can make a significant difference in the final appearance and performance of your metal roofing project.

Learn More About Metal Roofing Projects

A completed metal roofing project showcasing ridge caps.

To delve deeper into metal roofing projects, resources like the Metal Roofing Channel offer a comprehensive collection of videos covering various aspects of metal roofing. With over 500 videos available, you can find detailed guides and step-by-step instructions to help you tackle any metal roofing challenge.

Exploring various resources can help you gain a deeper understanding of metal roofing installations and achieve successful results in your projects.

Save Money on Your Metal Roofing Project

Saving money on your metal roofing project is possible with a few strategic steps. Check if manufacturers have surplus stock, as they may sell it at reduced prices. Buying from existing inventory can help you take advantage of lower prices before they are sold out.

Involving your installer early in the process can also identify cost-saving opportunities and ensure efficient use of materials. Ordering all necessary materials at once can streamline your project and potentially save you money.

Obtaining multiple quotes from different suppliers can help you find the most competitive pricing for your metal roofing project. Purchasing directly from manufacturers can often reduce costs since you cut out the middleman.

Summary

In summary, installing a steel roof ridge cap is a crucial step in ensuring the durability and effectiveness of your metal roof. By understanding the different types of ridge caps, preparing adequately, and following the correct installation steps, you can protect your home from water damage and extend the lifespan of your roofing system.

Armed with the right tools, materials, and knowledge, you can confidently take on this metal roofing project and achieve professional results. With regular inspections and maintenance, your metal roof will continue to safeguard your home for years to come.

Frequently Asked Questions

Why are ridge caps important for metal roofs?

Ridge caps are crucial for metal roofs as they seal the roof peak, effectively preventing water damage and reducing the risk of wind uplift. Ensuring proper installation of ridge caps is essential for the overall durability and functionality of the roof.

What tools do I need for ridge cap installation?

For ridge cap installation, you will need cutting snips, a carpenter’s pencil, cut-resistant gloves, a caulking gun, and silicone sealant. Ensuring you have these tools will help facilitate a smooth installation process.

How do I prepare my roof for ridge cap installation?

To prepare your roof for ridge cap installation, ensure the surface is clean and maintain a 2-inch gap between the roofing panels at the peak. This will facilitate proper ventilation and installation.

What is the difference between closed and vented ridge caps?

Closed ridge caps provide a watertight seal at the roof peak, whereas vented ridge caps facilitate moisture escape and enhance airflow, making them beneficial for roof ventilation.

How can I save money on my metal roofing project?

To save money on your metal roofing project, explore surplus stock, obtain multiple quotes, and consider buying directly from manufacturers. This approach can significantly reduce costs.

A person assessing their current attic insulation.

How to Insulate an Attic for Maximum Energy Efficiency

How to Insulate an Attic for Maximum Energy Efficiency

Need to insulate an attic? This guide will show you how to assess your current attic insulation, choose the right materials, and install them correctly for better energy efficiency and comfort.

Key Takeaways

  • Assess current attic insulation for thickness and integrity, ensuring it meets recommended R-value and is free from moisture or mold.
  • Choose the right insulation material, considering options like loose fill, batt, or spray foam, and prepare the attic by sealing air leaks and ensuring proper ventilation.
  • Upgrading attic insulation can lead to significant energy savings, improved home comfort, and increased Home value, balancing options between DIY and professional installation for optimal results.

Assess Your Current Attic Insulation

A person assessing their current attic insulation.

Begin by evaluating your current insulation. This helps identify areas needing improvement and ensures your efforts are effective. The first thing to check is the thickness of your existing insulation. Experts recommend an insulation thickness of R-30, which translates to about 10 to 13 inches.

Check for visible signs of moisture or mold, which indicate degraded insulation needing replacement. These issues not only reduce insulation effectiveness but also pose health risks and can damage your home’s structure.

Finally, ensure that insulation is applied between and over the floor joists in unfinished attic spaces. Properly insulating both the floor and the rafters is essential for optimal air distribution, which helps maintain a consistent temperature throughout your home.

Choose the Right Insulation Material

Different types of insulation materials for attics.

Choosing the right insulation material can seem overwhelming, but it doesn’t have to be. The most common types used in attics are loose fill insulation and batt insulation. Loose fill insulation, like cellulose or fiberglass, is excellent for filling gaps and providing comprehensive coverage. It’s particularly useful in attics with irregular or hard-to-reach spaces.

Batt insulation, on the other hand, comes in pre-cut panels that fit snugly between ceiling and floor joists. Fiberglass batts are a popular choice due to their ease of handling and installation, making them a favorite for DIY projects. However, batt insulation requires careful cutting and fitting to avoid gaps that can compromise its efficiency.

For superior moisture control, consider spray foam or blown-in cellulose. Closed cell spray foam, either closed-cell or open-cell, offers an airtight seal that greatly reduces air leaks and moisture infiltration. Your choice of material will also depend on factors like your attic’s size, the local climate, and any existing insulation materials.

Check local building codes for required R-values to ensure your rigid foam insulation meets minimum standards for energy efficiency and safety. By choosing the right insulation material, you’ll set the foundation for a more comfortable and cost-effective home.

Prepare the Attic for Insulation Installation

Proper preparation is key to the success of any insulation project. Before you begin installing insulation, it’s essential to clear and clean the attic space, seal any air leaks, and ensure proper ventilation. These steps not only make the installation process smoother but also enhance the overall effectiveness of your insulation.

Starting with a clean slate ensures that no debris or stored items interfere with the insulation process. Additionally, sealing air leaks prevents unwanted airflow and maintains the integrity of your insulation. Lastly, proper ventilation is crucial to avoid moisture buildup, which can damage your insulation and reduce its efficiency.

Clear and Clean the Attic Space

Remove all boxes, storage items, and debris from the attic. Though tedious, this step is vital for optimal insulation performance. Items stored directly on top of insulation can compress it, reducing its effectiveness by up to half. To expedite this process and keep the area clean, consider renting a dumpster for disposal of unwanted items.

Once the attic is clear, thoroughly clean the space. A clean workspace not only makes the installation process easier but also ensures that the insulation adheres properly and functions as intended. With a clutter-free attic, you’re ready to move on to sealing air leaks.

Seal Air Leaks

Air leaks can significantly undermine the effectiveness of your attic insulation. Common areas for leaks include around recessed lighting, attic access points, and any other openings. To identify these leaks, use a pen and notepad to mark problem areas as you inspect the attic.

Once you’ve identified the leaks, use materials like foam sealant, weatherstripping, and caulking to seal them. This process is crucial for achieving proper air sealing, which prevents unwanted airflow and enhances the efficiency of your insulation. Remember, the first step to effective insulation is ensuring that no air can bypass it.

Sealing air leaks also prevents issues like ice dams in cold climates, formed by warm air escaping into the attic and melting roof snow. This ensures your insulation works effectively without air seal interference.

Ensure Proper Ventilation

Ventilation is a key component of a healthy attic. Without proper ventilation, moisture can build up, leading to mold growth and insulation damage. Keep external soffit vents clear to maintain good airflow into the attic.

In cathedral ceilings, it’s essential to have a space between the roof deck and the home’s ceiling for proper insulation and ventilation. Installing vent baffles in these spaces helps maintain a clear ventilation channel, ensuring that air can flow freely and prevent moisture buildup, especially when considering the role of roof decking.

Using roof and ridge vents to allow hot air to escape is also essential. This protects your insulation and helps regulate your home’s temperature, ensuring year-round comfort.

Install the First Layer of Insulation

Installing the first layer of insulation in an attic.

Once the attic is prepared, install insulation as the first layer to create an initial barrier against heat loss and air leaks. Depending on your choice of insulation, the installation process may vary.

We’ll cover the details for loose fill insulation and batt insulation in the following subsections. Using a blower machine can help speed up the process for loose fill insulation, while batt insulation requires careful cutting and fitting to avoid gaps and over-compression.

Follow best practices to avoid common issues such as trapped moisture or under-insulated areas.

Loose Fill Insulation

Loose fill insulation, such as cellulose or fiberglass, is an excellent choice for attics with irregular spaces or hard-to-reach areas. To calculate the amount needed, divide your attic’s square footage by 1,000 and multiply by the desired R-value. This will give you a good estimate of how much insulation to purchase.

When installing loose fill insulation, it’s important to remove any existing vapor barriers. Vapor barriers can trap moisture, which can degrade the insulation over time. Using a blower machine, blow in the loose fill insulation evenly across the attic floor, ensuring there are no gaps or compressed areas. This method minimizes airborne particles and ensures thorough coverage.

If necessary, add a second layer using fiberglass batts to fill any remaining gaps for optimal results. This combination of loose fill and batt insulation creates a comprehensive barrier that significantly improves your attic’s energy efficiency.

Batt Insulation

Batt insulation, typically made of fiberglass, is designed to fit snugly between ceiling and floor joists. When installing batt insulation, make sure to cut it to the appropriate size, allowing for a tight fit without gaps. This ensures that the insulation performs effectively, providing a consistent thermal barrier.

Avoid over-compressing the batts, as this can restrict airflow and reduce their insulating capacity. Properly installed batt insulation should be placed snugly against the joists to prevent air leaks and maximize energy efficiency. For added effectiveness, consider placing a second layer of insulation perpendicular to the first, covering any remaining gaps.

Following these steps creates a solid foundation of insulation, significantly improving your home’s energy efficiency and comfort.

Add a Radiant Barrier

Radiant barriers are an excellent addition to your attic insulation strategy, especially in warm climates. These barriers reflect heat away from living spaces, reducing ceiling heat gains by up to 42% in some cases. They are particularly effective in attics with insulation levels like R-19.

For optimal performance, install a perforated radiant barrier on the rafters or on top of the first layer of insulation. Overlap sections by 1–2 inches to maintain a continuous barrier. If the insulation does not protrude above the floor joists, use a staple gun to secure the radiant barrier in place.

Be mindful of dust accumulation on the radiant barrier, as this can diminish its effectiveness over time. Regular maintenance and cleaning can help maintain its reflective properties, ensuring long-term energy savings and improved comfort.

Insulate the Attic Opening

Insulating the attic opening for better energy efficiency.

The attic opening is often overlooked but can be a significant source of energy loss. Insulate all entrances, including doors, hatches, and stairs. For simple doors or small entrances, affix insulation to the attic side of the door. This prevents warm air from escaping and cold air from entering.

For attic stairs, consider using an attic stair insulator. This can be a more cost-effective option but requires careful installation to ensure a proper seal. Alternatively, you can purchase an insulated zippered tent cover, which is easier to install but might be more expensive.

Failing to properly seal the attic entrance can result in missed energy cost savings.

Safety Precautions During Insulation

Safety should always be a priority when installing insulation. When handling fiberglass insulation, wear gloves, long sleeves, safety glasses, and a dust mask to protect against skin and respiratory irritation. For cellulose insulation, respiratory protection is essential due to its irritant properties.

Spray foam insulation contains chemicals that can trigger respiratory issues if safety measures are not followed. Ensure proper ventilation and use protective gear when applying spray foam. If you’re unsure about handling these materials, consider hiring professional contractors who are trained in safety protocols.

Proper insulation installation improves energy efficiency and ensures your health and safety. Follow these precautions to avoid common risks and achieve optimal results.

Benefits of Upgrading Attic Insulation

Benefits of upgrading attic insulation for energy efficiency.

Upgrading your attic insulation offers numerous benefits, starting with significant energy savings. Proper insulation can reduce your energy bills by up to 20%, making it a smart investment for long-term savings. Inconsistent room temperatures and drafts often indicate inadequate insulation, which can be resolved by upgrading your attic insulation.

Beyond economic benefits, proper insulation enhances comfort by maintaining consistent temperatures, reducing HVAC strain, and improving indoor air quality. Upgraded insulation also adds home value, making it a worthwhile investment for potential sales.

By upgrading your attic insulation, you create a more energy-efficient and comfortable living environment, contributing to both immediate and long-term benefits.

Professional vs. DIY Insulation

When deciding between professional and DIY insulation, there are several factors to consider. DIY insulation can provide significant cost savings by eliminating labor expenses, with potential savings ranging from $440 to $680. Affordable options for DIY projects include blanket (batt and roll) insulation, which can often be completed in a weekend.

However, DIY insulation poses risks of errors that could lead to energy loss and higher costs over time. Incorrect installation can result in gaps, over-compression, or inadequate coverage, all of which reduce the insulation’s effectiveness. These mistakes can negate the initial cost savings and lead to increased energy bills in the long run.

On the other hand, hiring professionals ensures proper installation, which is crucial for the effectiveness of your attic insulation. Professional contractors are trained in safety protocols and have the expertise to handle different insulation materials and techniques. They can also identify potential issues that a DIYer might overlook, ensuring that your insulation provides maximum energy efficiency and comfort.

Summary

In summary, insulating your attic involves several critical steps: assessing your current insulation, choosing the right materials, preparing the attic, installing the insulation, and ensuring proper safety measures. Each step contributes to creating an effective barrier that enhances your home’s energy efficiency and comfort. Whether you opt for loose fill insulation, batt insulation, or a combination of both, following best practices ensures optimal results.

Upgrading your attic insulation is a worthwhile investment that offers long-term benefits, including reduced energy bills, consistent indoor temperatures, and increased home value. By taking the time to properly insulate your attic, you can create a more comfortable and energy-efficient living environment. Ready to transform your attic into an energy-saving asset? The journey starts now.

Frequently Asked Questions

What problems do many Indiana homeowners face regarding their homes?

Many Indiana homeowners face issues with uncomfortable rooms and elevated utility expenses. Addressing these problems can lead to a more comfortable and cost-effective living environment.

How can upgrading attic insulation benefit homeowners?

Upgrading attic insulation is essential for homeowners as it significantly enhances comfort by preventing heat loss or gain, ultimately reducing HVAC usage and energy costs. Improved insulation leads to a more efficient home environment.

What is a common issue for homes older than five years regarding attic insulation?

A common issue for homes older than five years is insufficient or missing attic insulation, which can lead to higher energy costs and reduced comfort. It’s essential to evaluate and upgrade your insulation to maintain efficiency.

How can attic insulation affect energy bills?

Attic insulation significantly reduces energy bills by creating a barrier that retains heat in winter and cool air in summer, which can lead to savings of up to 20%. Investing in proper insulation is a cost-effective way to enhance energy efficiency in your home.

Benefits of installing new shingles over an old roof.

Pros and Cons of Installing Shingles Over Existing Roof

Pros and Cons of Installing Shingles Over Existing Roof

Can you install shingles over an existing roof? It’s possible, but it has its pros and cons. This article covers the benefits, drawbacks, and alternatives, so you can decide if installing shingles over an existing roof is the right choice for your home.

Key Takeaways

  • Installing new shingles over an existing roof can save costs and time but requires a thorough inspection of the underlying roof condition.
  • While this method provides immediate benefits, it poses significant risks, including potential leaks, structural strain, and reduced roof longevity.
  • Consultation with a roofing professional is essential for tailored recommendations and ensuring compliance with building codes and warranty conditions.

Can You Install New Shingles Over Existing Roof?

A roof being installed with new shingles over existing shingles.

You can install new shingles on top of an existing asphalt shingle roof. However, this is only possible under the right conditions. This method, often called a nail-over or overlay, is popular among homeowners looking to save time and money. However, you must ensure that the existing shingles are near the end of their lifespan, flat, with few penetrations and small flashing issues. Before proceeding, have a local roofing contractor thoroughly inspect the integrity of the existing roof and metal flashing.

Since most roofs are not ideal candidates for a nail-over installation, a proper assessment is necessary. If the roof decking is compromised, it must be replaced before new shingles can be installed. This step is necessary because installing shingles over old ones can obscure potential issues, preventing a thorough inspection of the roof decking’s integrity. This can hide problems that could lead to significant damage down the line.

The decision to install new shingles over existing ones should not be taken lightly. While it can be a cost-effective and time-saving solution, the long-term implications must be carefully considered. Consulting a roofing professional helps you make the best choice for your situation, ultimately protecting your investment and home.

Benefits of Installing New Shingles Over an Old Roof

Benefits of installing new shingles over an old roof.

Installing new shingles over an old roof can offer several benefits, primarily revolving around cost savings, time efficiency, and weather protection. These advantages make it an attractive option for many homeowners.

Here are the details of each benefit.

Cost Savings

One of the most compelling reasons homeowners consider installing new shingles over existing ones is the potential for significant cost savings. Skipping the process of tearing off old shingles can save approximately 15% of the overall roofing cost. This reduction comes from eliminating the need to dispose of old shingles, which can constitute about 30% of the total roofing job time.

Additionally, avoiding disposal fees for old shingles can further reduce costs. This approach allows homeowners to allocate their budget to other essential home improvements without compromising the quality of their new roof.

Time Efficiency

Time efficiency is another significant advantage of installing new shingles over an existing roof. Layering new shingles over old ones is generally quicker than a full roof replacement that involves tearing off the old roof. This expedited installation can save homeowners valuable time, making it a less disruptive option for those who need their roofing project completed promptly.

Avoiding the tear-off process significantly reduces the overall installation time. This means less hassle and a quicker return to the comfort of your home without the prolonged inconvenience of a full roof replacement.

Weather Protection

Installing new shingles over an old roof can provide additional weather protection during the installation process. Retaining the old shingles creates a protective barrier against rain and other elements, safeguarding the roof structure and interior of the home while the new shingles are being installed.

This extra layer is particularly beneficial in preventing water damage to the roof deck and other structural components during the roofing project. By keeping the old shingles in place, you can ensure that your home remains protected from the elements until the new roof is fully installed.

Drawbacks of Installing New Shingles Over an Existing Layer

Drawbacks of installing new shingles over an existing layer.

While there are clear benefits to installing new shingles over an existing layer, there are also significant drawbacks to consider. These include inspection challenges, increased risk of leaks, and potential structural strain.

Let’s delve into these issues.

Inspection Challenges

One of the primary drawbacks of installing new shingles over an existing layer is the difficulty in conducting thorough inspections. A double layer of shingles obstructs the ability to assess the roof deck for damage during inspections. Home inspectors often find it challenging to identify if the underlying wood needs repair when old shingles remain in place.

Two layers of shingles complicate the inspection process, making it difficult to spot underlying damage and increasing the challenges of future repairs. This can lead to undetected issues that might escalate over time, resulting in more extensive and costly repairs.

Leak Risks

Placing new shingles over old ones also increases the risk of leaks. This practice can prevent the proper installation of leak barriers, making the roof more susceptible to leaks. Overlaying shingles can also shorten the roof’s lifespan due to improper installation and hidden damage, leading to a higher likelihood of water infiltration.

Future repairs can become complicated as roofers may miss underlying issues, leading to more extensive damage if not properly managed. Certified roofing experts can identify and resolve potential issues effectively, but multiple shingle layers still pose significant challenges.

Structural Strain

Adding a new layer of shingles increases the overall weight on the roof, which can strain the existing roof structure. This additional weight can lead to serious problems, including potential structural strain and even collapse in extreme cases.

Covering up existing roof problems with new shingles does not repair current issues; it merely obscures them, allowing defects in the old shingles to telegraph through to the new layer and compromise its integrity.

Additionally, the uneven surface of the old roof can make it harder to secure and mount the new shingles properly, further compromising the roof’s structural integrity. This can result in a less durable and reliable roofing system, increasing the likelihood of future problems.

Impact on Roof Longevity and Performance

Impact on roof longevity and performance.

Installing new shingles over an existing roof can significantly impact the longevity and performance of the roof. These impacts include a reduced lifespan, energy efficiency concerns, and complications with future repairs.

Reduced Lifespan

Adding layers of shingles can significantly impact the roof’s effective lifespan. Multiple roofing layers can lead to quicker material degradation, reducing the overall lifespan of the roof. This accelerated deterioration can result in a premature need for roof replacement, negating the initial cost savings of installing new shingles over old ones.

Layered shingles are likely to shorten the lifespan of a roof compared to a single layer of shingles. Homeowners should carefully weigh this downside against the immediate benefits of cost and time savings.

Energy Efficiency Concerns

Installing multiple layers of shingles can negatively impact a roof’s energy efficiency. The extra layers can hinder effective ventilation, potentially leading to increased energy costs for heating and cooling. In warmer climates, multiple layers of shingles can retain heat, exacerbating attic ventilation issues and increasing air conditioning costs.

Homeowners should consider the long-term implications on energy efficiency when deciding whether to install new shingles over existing ones. The potential increase in energy costs may offset the initial savings from avoiding a full roof replacement.

Future Repairs

The presence of multiple shingle layers can complicate future repairs and maintenance. Home inspectors may report the presence of two layers, leading to identified problems that complicate repairs. The additional layers can decrease the home’s value and complicate the sale process, making future repairs even more challenging.

Considering these complications is crucial when deciding to install new shingles over existing layers to avoid future issues. Homeowners should weigh the immediate benefits against the potential long-term challenges.

Building Codes and Regulations

Adhering to building codes and regulations is essential when considering installing new shingles over an existing roof. These codes ensure safety and compliance with local guidelines.

Code Variations

Building codes vary significantly across different regions, impacting roofing projects. It is crucial for homeowners to familiarize themselves with local building codes before starting a roofing project. These regulations can influence the number of allowable shingle layers and other essential aspects of the roofing process.

Understanding these variations ensures that your roofing project complies with local guidelines and avoids potential legal or safety issues.

Fire Safety

Certain building codes include fire safety regulations that dictate the number of allowable shingle layers. Fire safety is a critical consideration when selecting roofing materials, especially regarding multiple layers of shingles. Compliance with these regulations prevents potential fire hazards and protects your home.

Homeowners should consult with a roofing professional to ensure that their roofing project adheres to all relevant fire safety codes and regulations.

Warranties and Insurance Considerations

Installing new shingles over old roof shingles can have significant implications for warranties and insurance coverage.

Understanding these considerations is crucial for protecting your investment.

Manufacturer Warranties

Many manufacturer warranties become void if new shingles are installed over an old shingle layer. Some manufacturers may not cover issues arising from improper installation when new shingles are placed over existing ones. This can complicate warranty claims and leave homeowners without coverage for potential roofing issues.

Homeowners should carefully review their warranty terms and consult with manufacturers before deciding to install new shingles over old ones.

Insurance Implications

Insurance policies typically restore roofs to their original state, which may not include upgrades if shingles are layered. Many insurance companies have specific policies regarding roofs with multiple layers, leading to potential coverage issues for homeowners if they need to file a claim after installing a layered roof.

Understanding your insurance policy is important before deciding to install new shingles over an existing roof. This way, you are aware of any potential coverage limitations or exclusions.

Alternatives to Shingling Over Existing Roof

Alternatives to shingling over an existing roof.

For homeowners who are hesitant about installing new shingles over an existing roof, there are viable alternatives to consider regarding shingle roofs.

These alternatives can offer better long-term investment, durability, and overall value.

Full Roof Replacement

Replacing the entire roof allows for a fresh installation, potentially improving home value. A certified roofing specialist can evaluate the current state of your shingles and recommend the most appropriate roofing solutions. The average cost of a complete roof replacement typically ranges around $11,500 for an average-sized home.

While a full roof replacement involves higher upfront costs, it can provide a more durable and reliable roofing system, reducing the need for future repairs and maintenance.

Metal Roofing Over Shingles

Yes, it is possible to put metal roofing over existing asphalt shingles, depending on local building codes. Metal roofing offers long-term benefits, such as a lifespan of about 50 years and the elimination of the need to tear off the existing roof. Additionally, metal roofing is lightweight, which can be advantageous when adding it over existing shingles.

This option can provide a durable and energy-efficient solution for homeowners looking to upgrade their roofing system without the hassle of a full roof replacement.

Consulting a Roofing Professional

Consulting a professional roofing contractor is essential for determining the best course of action for roof repairs. A qualified roofing contractor can provide valuable insights on whether to overlay shingles based on the roof’s condition.

Professional Assessment

A certified roofing expert should thoroughly inspect the existing roof to ensure it can support additional shingles. The condition of the current shingles and financing options should be assessed before deciding to layer shingles. This assessment can identify any underlying issues that need to be addressed before proceeding with the installation of new shingles.

Homeowners can greatly benefit from the insights provided by a professional assessment. A roofing expert can recommend the most suitable solutions based on the unique conditions of the roof, ensuring that the new installation meets all necessary standards and prolongs the roof’s lifespan.

Customized Solutions

Roofing professionals can tailor solutions to meet specific homeowner needs based on the unique conditions of the roof. Different roof conditions—such as existing damage, age, and local environmental factors—necessitate unique approaches to roofing solutions. Consulting a professional provides homeowners with tailored recommendations that optimize the roof’s performance and longevity.

A certified roofing expert’s thorough inspection is crucial for identifying potential issues and determining the best course of action. This personalized approach ensures that the roofing project addresses all potential challenges, providing peace of mind for the homeowner.

Summary

Deciding whether to install new shingles over an existing roof involves weighing the benefits and drawbacks carefully. While there are clear advantages in terms of cost savings, time efficiency, and weather protection, there are also significant concerns related to inspection challenges, leak risks, structural strain, and impacts on roof longevity and performance. Adhering to building codes and understanding the implications for warranties and insurance are crucial considerations.

Ultimately, consulting a roofing professional for a thorough assessment and customized solutions is essential. This ensures that you make an informed decision that best suits your specific roofing needs and circumstances. By considering all these factors, you can protect your investment and ensure the long-term health of your home.

Frequently Asked Questions

Can you install new shingles over an existing roof?

You can install new shingles over an existing asphalt shingle roof, but it’s essential to have a roofing professional conduct a thorough inspection first. This will ensure the longevity and integrity of your new roof.

What are the benefits of installing new shingles over old ones?

Installing new shingles over old ones can save you money, reduce installation time, and provide better weather protection during the process. This approach can be an efficient solution for roof maintenance.

What are the drawbacks of installing new shingles over an existing layer?

Installing new shingles over an existing layer can lead to inspection challenges, increased risk of leaks, and additional strain on the roof structure, ultimately reducing the roof’s longevity and energy efficiency. It’s essential to weigh these drawbacks carefully before proceeding.

How do building codes affect the decision to install new shingles over an existing roof?

Building codes often limit the installation of new shingles over existing ones to a maximum of two layers for safety. It is crucial to be aware of and adhere to local regulations to ensure compliance and avoid potential hazards.

What are the alternatives to installing new shingles over an existing roof?

You can consider a full roof replacement or installing metal roofing over existing shingles, as both options provide long-term durability and value.

A professional roofing contractor installing impact resistant shingles on a house

Best Impact Resistant Roof Shingles: Protect Your Home Today

Best Impact Resistant Roof Shingles: Protect Your Home Today

Looking to protect your home from severe weather? Impact resistant roof shingles are your best defense against hail, high winds, and debris. In this guide, we’ll explore how these shingles work, their benefits, and what materials to consider.

Key Takeaways

  • Impact-resistant shingles provide enhanced protection against severe weather, significantly extending roof lifespan to 30-50 years and reducing the need for replacements.
  • The performance of impact-resistant shingles is measured using the UL 2218 test, with Class 4 being the highest rating, indicating superior durability against hail and wind.
  • Investing in impact-resistant roofing can lead to lower homeowners insurance premiums and considerable long-term savings through reduced repair costs.

The Best Impact Resistant Roof Shingles: Protect Your Home Today

A house with impact resistant roof shingles, showcasing their protective features

If you’ve ever experienced the gut-wrenching aftermath of a severe storm, you understand the critical role your roof plays in safeguarding your home. Impact-resistant shingles are specifically engineered to endure severe weather conditions, enhancing the overall strength and longevity of a roof. These shingles can help maintain a home’s structural integrity by providing reliable protection against hail and strong winds.

The durability of impact-resistant shingles can extend their lifespan to 30 to 50 years, significantly reducing the need for replacements. For those living in areas with a high likelihood of severe weather events, these shingles are particularly beneficial. Consider local weather patterns and storm frequency when selecting impact-resistant shingles.

Different types of impact-resistant roofing materials, such as metal, asphalt, slate, concrete, and clay, offer unique benefits and cost considerations. Each material provides its own set of advantages, but the primary goal remains the same: to protect your home effectively. This guide will help you understand how to choose the best impact-resistant shingles for your needs.

Introduction

Roof damage from hail, airborne debris, and high winds is a growing concern for homeowners, making it crucial to consider impact-resistant roofing solutions that can withstand more extreme weather. These shingles are designed to protect homes from severe weather conditions such as hailstorms and strong winds. The right shingles can significantly reduce damage risk and keep your home safe.

Understanding Impact Resistant Roof Shingles

A close-up of impact resistant shingles demonstrating their texture and durability

Impact-resistant shingles are specifically engineered to endure severe weather conditions, enhancing the overall strength and longevity of a roof. The unique composition and design of these shingles make them the most durable option available. Consider the weather common to your local area when deciding on shingles.

What Are Impact Resistant Shingles?

Impact-resistant roof shingles are designed with a thicker base mat and more flexible materials than traditional options. These shingles are constructed with advanced materials that enhance their durability compared to standard shingles. Their unique composition and design make impact-resistant shingles the most durable option available.

Asphalt shingles modified with rubberized polymers enhance their resistance to impact. Composite shingles combine asphalt with synthetic materials for better durability and impact resistance. These advancements in shingle design and construction have led to better protection from hail and high winds.

How Impact Resistance Is Measured

The UL 2218 test, known as the steel ball test, evaluates shingles by dropping a steel ball from a specified height to assess their impact resistance. Shingle ratings vary from Class 1 to Class 4, reflecting the level of impact they can withstand based on standardized tests. Class 4 is the highest rating for impact-resistant shingles. This classification indicates superior durability.

To attain a Class 4 rating, shingles must endure the impact of a 2-inch steel balls dropped from 20 feet multiple times. To pass the UL 2218 test, shingles must show no ruptures or cracks after impact.

Typically rated Class 4, impact-resistant shingles are a reliable choice for severe weather protection.

Benefits of Installing Impact Resistant Shingles

A photo illustrating the benefits of installing impact resistant shingles

Impact-resistant shingles provide enhanced protection against severe weather, including hail and wind. These shingles can prevent costly roof damage, especially in areas prone to severe weather. They typically last about 50% longer than standard shingles, reducing the frequency of roof replacements.

Installing impact-resistant roofing can provide peace of mind and a sense of security.

Enhanced Durability

Shingles classified as Class 4 can endure impacts from a 2-inch steel ball dropped from 20 feet without cracking. Impact-resistant asphalt roofing shingles are designed to withstand the impact of hail. Certain Class 4 impact-resistant shingles can endure winds reaching up to 130 mph.

Hail-resistant shingles, with higher impact resistance ratings than traditional asphalt shingles, are engineered to withstand greater impacts and reduce storm damage, offering unparalleled durability.

Financial Benefits

Investing in impact-resistant roofing can potentially lead to lower homeowners insurance premium due to the reduced risk of damage. Homeowners can save on potential repair costs, which can average around $4,250 for hail damage. Switching to impact-resistant roofing can reduce insurance premiums by 5% to 35%.

Many homeowners report significant financial savings and peace of mind after switching to impact-resistant shingles. Insurance companies offer discounts as an added bonus, making the initial investment more palatable in the long run.

Environmental Advantages

The long lifespan of impact-resistant shingles means less waste in landfills, providing eco-friendly benefits that make a positive environmental impact while protecting your home.

Types of Impact Resistant Roofing Materials

Various types of impact resistant roofing materials displayed together

Impact-resistant roofing materials typically include recycled or recyclable materials that enhance sustainability. Among common types of roofs that are considered impact-resistant is metal roofing. Each material provides its own set of advantages, but the primary goal remains the same: to protect your home effectively.

Asphalt Shingles vs. Hail Resistant Shingles

Hail-resistant shingles are designed to endure severe weather conditions better than traditional asphalt shingles. They typically undergo rigorous testing, such as UL 2218, to assess their ability to endure impacts from hail and debris, distinguishing them from traditional asphalt shingles.

Impact-resistant roof shingles are designed with a thicker base mat and more flexible materials than traditional options. Synthetic roofing materials are designed to imitate traditional options while providing better durability and impact resistance.

Metal, Slate, Concrete, and Clay Options

Metal, slate, concrete, and clay roofs are impact-resistant and while they cost more than asphalt or composite shingles, they can also last significantly longer. Concrete and clay roofs provide significant durability against impacts and generally have a longer lifespan than asphalt shingles.

Each material brings unique benefits, from aesthetic appeal to longevity.

Choosing the Right Impact Resistant Shingles for Your Home

Choosing the right impact-resistant shingles is essential for ensuring your home is protected against severe weather conditions. Proper installation of impact-resistant roofs is also crucial for their performance and longevity.

Professionally installed impact-resistant roofs ensure compliance with local building codes and regulations, enhancing durability.

Factors to Consider

Homeowners should evaluate their local climate when selecting roofing materials, as different shingles perform better in varying weather conditions. Homeowners in hail-prone regions are specifically advised to consider Class 4 impact-resistant shingles for optimal protection.

Budget constraints could also guide the selection of shingles, as higher-rated impact-resistant options typically carry a higher cost.

Consulting a Professional Roofing Contractor

Schedule an inspection with a professional roofing contractor to determine if your roof is impact resistant. An experienced roofing contractor ensures your impact-resistant roof complies with local regulations and building codes.

Installation and Maintenance of Impact Resistant Roofs

A professional roofing contractor installing impact resistant shingles on a house

Proper installation of impact-resistant shingles involves specific guidelines, such as ensuring a solid substrate and proper nailing techniques to enhance durability.

Regular inspections and maintenance later on, such as clearing debris and checking for shingle damage, are essential to extend the life of impact-resistant roofs.

Proper Installation Techniques

Hiring experienced contractors ensures not just proper installation but also compliance with warranty requirements for the shingles. The installation process significantly influences the roof’s overall performance. Selecting experienced contractors is crucial for ensuring proper installation and compliance with local building codes.

Homeowners should obtain written estimates and contracts to ensure transparency and accountability in the roofing process. Detailed written contracts covering scope, materials, and payment schedules are essential for clarity and accountability in roof installation. Proper installation techniques enhance the performance and longevity of impact-resistant roofing materials.

Routine Maintenance and Inspections

Professional routine inspections can identify potential issues early, keeping the roof in optimal condition. Regular inspections, ideally every three to five years, prevent minor issues from escalating into costly repairs. Maintaining clean gutters and removing debris can greatly enhance the lifespan of an impact-resistant roof.

Clearing debris from gutters and downspouts is vital maintenance for preventing roof damage. Regular maintenance is key to ensuring the longevity and performance of your impact-resistant roof.

Are Impact Resistant Shingles Worth the Investment?

Although the higher initial cost of impact-resistant shingles may deter some homeowners, the long-term savings and peace of mind often outweigh the initial expense.

Impact-resistant shingles can lead to lower future roof repair costs and longer lifespan, providing considerable long-term financial savings.

Cost Analysis

Impact-resistant shingles typically have a higher upfront cost compared to standard asphalt shingles, ranging from 10% to 25% more. The main downside of Class 4 impact-resistant shingles is their higher upfront cost. However, the initial costs may be justified in areas frequently hit by hail and windstorms, as these shingles can save on repair costs in the long run.

The location, type of shingles, and choice of roofing contractor significantly influence overall cost and potential savings. While impact-resistant shingles have a higher cost than standard roofs, they can potentially reduce overall expenses due to fewer repairs needed.

Summary

Billions of dollars in damage each year are caused by hail impacts, underscoring the financial consequences of traditional roofing materials. Homeowners increasingly face severe weather threats, making impact-resistant shingles a crucial investment for home protection.

Impact-resistant shingles offer unparalleled protection against severe weather, providing peace of mind and long-term financial benefits. Their enhanced durability, combined with potential insurance discounts and environmental advantages, make them a smart investment for any homeowner. Protect your home today with impact-resistant shingles and enjoy the security and savings they bring.

Frequently Asked Questions

What are impact-resistant shingles?

Impact-resistant shingles are specially designed with thicker base mats and flexible materials to withstand severe weather conditions like hail and high winds, providing enhanced protection for your home. Their strength makes them a reliable choice for maintaining roof integrity during harsh weather.

How is the impact resistance of shingles measured?

The impact resistance of shingles is measured using the UL 2218 steel ball test, which evaluates durability by dropping a steel ball from a specified height. Shingles are then rated from Class 1 to 4, with Class 4 indicating the highest level of impact resistance.

What are the financial benefits of installing impact-resistant shingles?

Installing impact-resistant shingles can significantly lower home insurance premiums by 5% to 35%, while also reducing the likelihood of costly repairs. This results in substantial long-term savings for homeowners.

What types of materials are used for impact-resistant roofs?

Impact-resistant roofs typically utilize materials such as asphalt, metal, slate, concrete, and clay, each providing distinct advantages in terms of durability and weather resistance. Selecting the right material can enhance both the longevity and protection of your roof.

Are impact-resistant shingles worth the investment?

Impact-resistant shingles are typically worth the investment due to their long-term benefits, including reduced repair costs and potential discounts on insurance, while providing robust protection against extreme weather.