How to Fix Vinyl Siding: Common Issues and Solutions
Need to fix damage to your vinyl siding? This guide will show you how to fix vinyl siding by assessing the damage, cleaning the area, and making necessary repairs. From patching small holes to replacing panels, these steps will help you get your siding back in shape.
Key Takeaways
-
Regular maintenance and inspections of vinyl siding are critical for identifying and addressing damage early, preventing more serious structural issues.
-
Small holes and cracks can be easily repaired with waterproof caulk, while extensive damage may require the replacement of entire panels to maintain structural integrity.
-
Proper cleaning, color matching, and following manufacturer guidelines during repairs are essential for ensuring durable and aesthetically pleasing results.
Assessing the Damage

Before starting any repair work, assess the damage to your vinyl siding. Regular maintenance and inspections can catch issues early, preventing more severe problems. Even minor damage, if ignored, can lead to water infiltration and structural issues.
Start by inspecting your siding for small holes and cracks. These minor imperfections are often easy to fix but crucial to address. For more extensive damage, evaluate the affected area to determine if panel replacement is necessary. Failing to address significant damage can compromise your home’s structural integrity.
Inspect for Small Holes and Cracks
Checking for small holes and cracks is the first step in maintaining your vinyl siding’s integrity. Carefully evaluate the extent of the damage, as minor imperfections can be easily overlooked. Waterproof caulk is effective for sealing these small openings. Prompt repairs of small holes and cracks prevent further damage and extend the lifespan of your vinyl siding. After applying caulk, smooth it out and let it dry thoroughly for optimal results.
Evaluate Extensive Damage
For more significant issues, evaluate the extent of the damage. Check for large sections that may need replacement and assess whether the damage compromises the house’s structural integrity. For extensive damage, replacing entire panels might be more practical than patching up multiple areas. This ensures a durable repair and maintains the siding’s visual appeal.
Cleaning the Repair Area

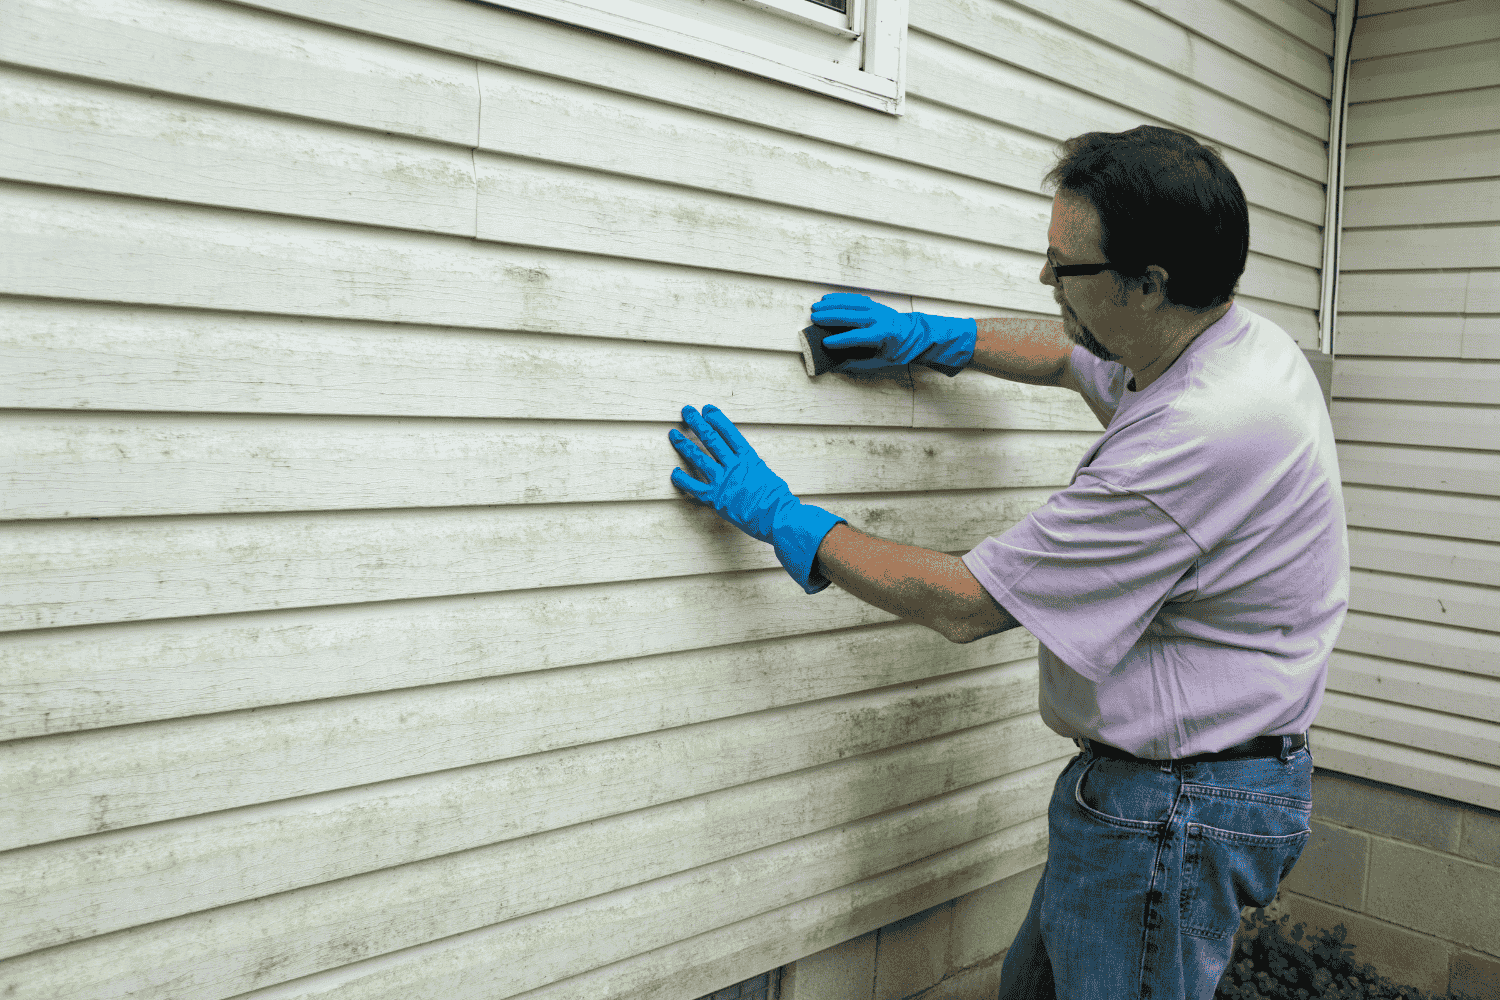
Cleaning the repair area is crucial in vinyl siding repair. Dirt and debris can interfere with the adhesion of repair materials. Warm soapy water and a microfiber cloth can thoroughly remove contaminants like dirt and mildew.
A clean surface ensures that the repair materials bond properly, making the repair more effective and long-lasting. Once cleaned, ensure the area is completely dry before proceeding to prevent moisture from compromising adhesion.
Use Warm Soapy Water
Warm soapy water is best for cleaning the repair area. A microfiber cloth is recommended as it effectively removes dirt without scratching the surface. Thoroughly clean the area before proceeding with repairs. This cleaning step ensures that the repair materials adhere properly to the siding. Skipping this step can result in poor adhesion and a less durable repair.
Dry Thoroughly
After cleaning, ensure the area is completely dry. Moisture can prevent adhesives and sealants from bonding effectively, leading to potential issues later. Eliminate all moisture to ensure the repair materials bond properly and the repair is durable. This step prevents water damage and ensures the longevity of the repair.
Fixing Small Holes and Cracks
Fixing small holes and cracks in vinyl siding is often easy and can prevent more extensive damage. Waterproof caulk effectively seals these small imperfections. A caulk gun allows for precise application, ensuring controlled and even distribution of caulk. Once the caulk is applied, smooth it out and let it dry thoroughly to create a clean and uniform appearance. This simple repair can significantly extend the lifespan of your vinyl siding.
Apply Waterproof Caulk
Use waterproof caulk that matches the color of your vinyl siding to repair small holes and cracks. Fill the divots and holes with caulk, then smooth out the area for a clean finish. Allow the caulk sufficient time to dry before exposing it to rain or other elements.
Sand and Paint
After the caulk has dried, gently sand the area. Start with 100-grit sandpaper and finish with 220-grit sandpaper. This creates a smooth surface that blends in with the surrounding siding. After sanding, apply paint that matches the existing siding color. Use an acrylic primer followed by acrylic house paint for a seamless look.
Replacing Damaged Panels

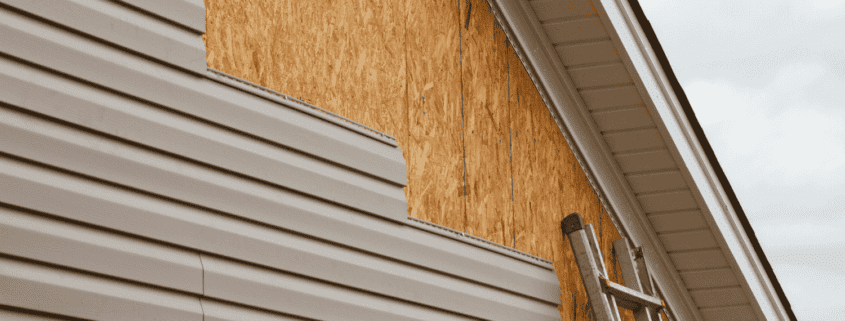
Sometimes, damage to your vinyl siding may be too extensive for simple repairs, necessitating the replacement of damaged panels. Correct overlap of vinyl siding panels prevents water infiltration and maintains a visually appealing finish. Panels should overlap at least one inch to effectively shield your home from water damage.
Following the manufacturer’s installation guidelines is crucial for maintaining the warranty and performance of your vinyl siding.
Remove the Damaged Panel
Gather tools for removing the damaged panel, such as a zip tool, hammer, prybar, drill, and utility knife. Use the zip tool to carefully unhook the damaged vinyl siding panel. If the panel is secured with nails, remove them using a hammer or prybar; for screws, use a drill. Avoid damaging the building paper underneath when cutting out and detaching the damaged siding.
Prepare the Replacement Piece
When measuring for a replacement piece, ensure it extends about two inches beyond the damaged area for effective patching. This creates a secure and durable repair.
Install the New Panel
Measure the damaged area and cut a patch extending about two inches on each side. The new piece of vinyl siding should be four inches wider than the original piece to ensure proper overlap.
Secure the top of the new vinyl panel using nails or screws. Align the bottom lip of the above panel with the top lip of the replacement panel and pull up until it locks. Use a zip tool to connect the new panel to the existing panels.
Tips for Seamless Repairs

Seamless repairs enhance both the appearance and longevity of your vinyl siding. Color matching maintains the aesthetic integrity of your siding. Proper overlap ensures it remains watertight and visually uniform.
Color Matching
Identifying the right color for replacement pieces maintains the aesthetic integrity of your vinyl siding. Lightly sand the dried caulk and paint it to blend with the existing siding color. A seamless look is achieved by ensuring proper overlap and following the manufacturer’s instructions for repairs.
Proper Overlap
Proper overlap in vinyl siding prevents water damage and creates a uniform appearance. When preparing a replacement piece of siding, measure and cut it to ensure it overlaps correctly with adjacent panels. To install the new panel, slide it into place ensuring it overlaps securely and locks with the adjacent panels.
Using Manufacturer’s Instructions
Following the manufacturer’s guidelines during installation and repairs can enhance the durability and effectiveness of repair vinyl siding. Always follow the specific directions provided by the siding manufacturer for optimal installation.
Preventing Future Damage

Preventing future damage to your vinyl siding involves regular inspections and protective measures. Regular inspections help identify potential issues before they escalate, allowing prompt addressing.
Protecting your vinyl siding from temperature changes is also important. Temperature fluctuations can cause the siding to expand and contract, leading to warping and cracking.
Regular Inspections
Conducting regular inspections is essential for identifying and evaluating the extent of damage to your vinyl siding. Check for small holes and cracks that can be easily fixed with caulk or filler. If extensive damage is found, evaluate whether large sections of siding need replacement and assess any potential structural impact on the house.
Protect from Temperature Changes
Temperature fluctuations can cause vinyl siding to expand and contract, leading to warping and cracking. Ensure proper installation that allows for thermal expansion to protect vinyl siding from temperature damage. Conduct regular inspections to identify and address potential damage before it worsens due to temperature changes.
Summary
Summarize the key points of the article, emphasizing the importance of regular inspections, proper cleaning, fixing small issues, and replacing damaged panels. Conclude with a motivational note encouraging proactive maintenance and repair.
Frequently Asked Questions
How often should I inspect my vinyl siding?
You should inspect your vinyl siding at least once a year to identify and resolve any potential issues early on. This proactive approach helps maintain its integrity and appearance.
What is the best way to clean the repair area before fixing vinyl siding?
The best way to clean the repair area before fixing vinyl siding is to use warm soapy water with a microfiber cloth, ensuring all dirt and debris are thoroughly removed. This will provide a clean surface for effective repairs.
Can I use any type of caulk for vinyl siding repairs?
For vinyl siding repairs, it’s essential to use a waterproof caulk that matches the color of your siding, ensuring both effective sealing and a harmonious look.
How do I ensure my repairs are seamless?
To achieve seamless repairs, focus on proper color matching, ensuring the correct overlap, and carefully following the manufacturer’s instructions. These practices will help you achieve a flawless finish.
How can I prevent future damage to my vinyl siding?
To prevent future damage to your vinyl siding, conduct regular inspections and shield it from extreme temperature fluctuations. This proactive approach will help maintain its integrity over time.
 574-318-3326


